Harley Quinn – mask, bib, hood, and shoes
So back to my classic Harley Quinn. Thus far i have shared about making the body suit and cuffs.
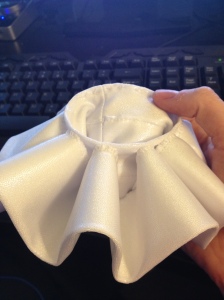
the next part i finished was the bib. i used the shape i showed before. i ended up taking advantage of spandex’s not-unravel-ly nature and rather than sewing right sides together and flipping it, i just sewed wrong sides together and cut very close to my stitching. the other way completely lost the spade shape i had going. there were a few hiccups with the standup collar. originally i cut a big rectangle and it made it either way too wide or it wouldnt cover the bib. so i had to make the base wider and taper narrower to the top to fit my neck. i tried a trapezoid shape and that did not work either. in the end i used a curved rectangle. i think the amount of curve was entirely arbitrary. after that it was just adding snaps (i will probably switch out the ones i have on now. too large and black so they show through) and sewing on the puffs at the ends. heres a mostly finished shot that also shows the shape of the stand up collar.
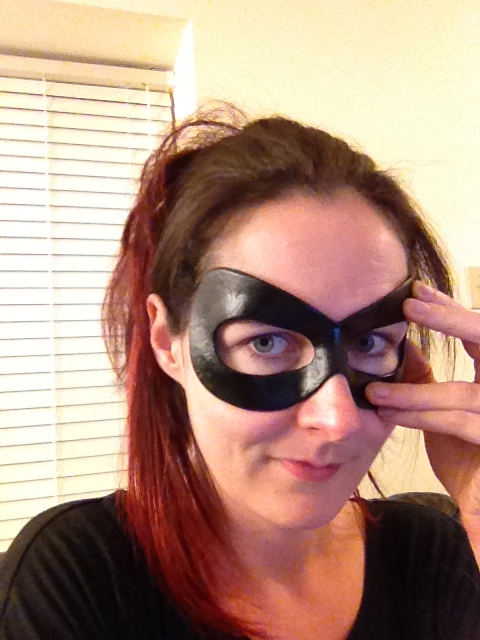
 next ill show you the mask. i used Worbla for that since it needed to curve well. for armor-ish stuff that doesnt need multiple directions of curve ill use wonderflex instead because its much cheaper and easier to get. i looked at some HQ comics and pictures on the internet of fan art and other cosplayers to get some ideas. there are so many ways to make her mask. i cut several shapes out of paper and tried them on my face to see what looked best and chose one. i cut two of the same shape. first i heated and shaped a single layer on my face (i didnt let it get too hot, just enough to make it pliable but not enough to burn me). when it fit well i heated the second layer and melted it to the first and again fitted it to me. after that i followed the internet and other cosplayers advice and primed and sanded it. in the end i dont know if it was worth the time and effort. it may have added some thickness and visual weight but worbla is fairly smooth to begin with and i dont think the sanded primer yielded any difference. it didnt help my first can of spray primer had a faulty nozzle and essentially gave my mask tumors all over it. so i had to sand all of it off and start over. i was using a drimmel and the primer pretty much destroyed some sanding wheels. good thing those are cheap. when i decided it was good enough i spray a satin finish spray paint on it and voila! when i wear it i will just stick it to my brows with spirit gum. i have a very cheeky smile so ill have to tone it down and smile with just the lower half of my face so i dont dislodge it. im pretty happy with it.

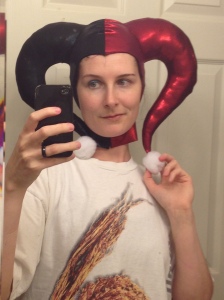
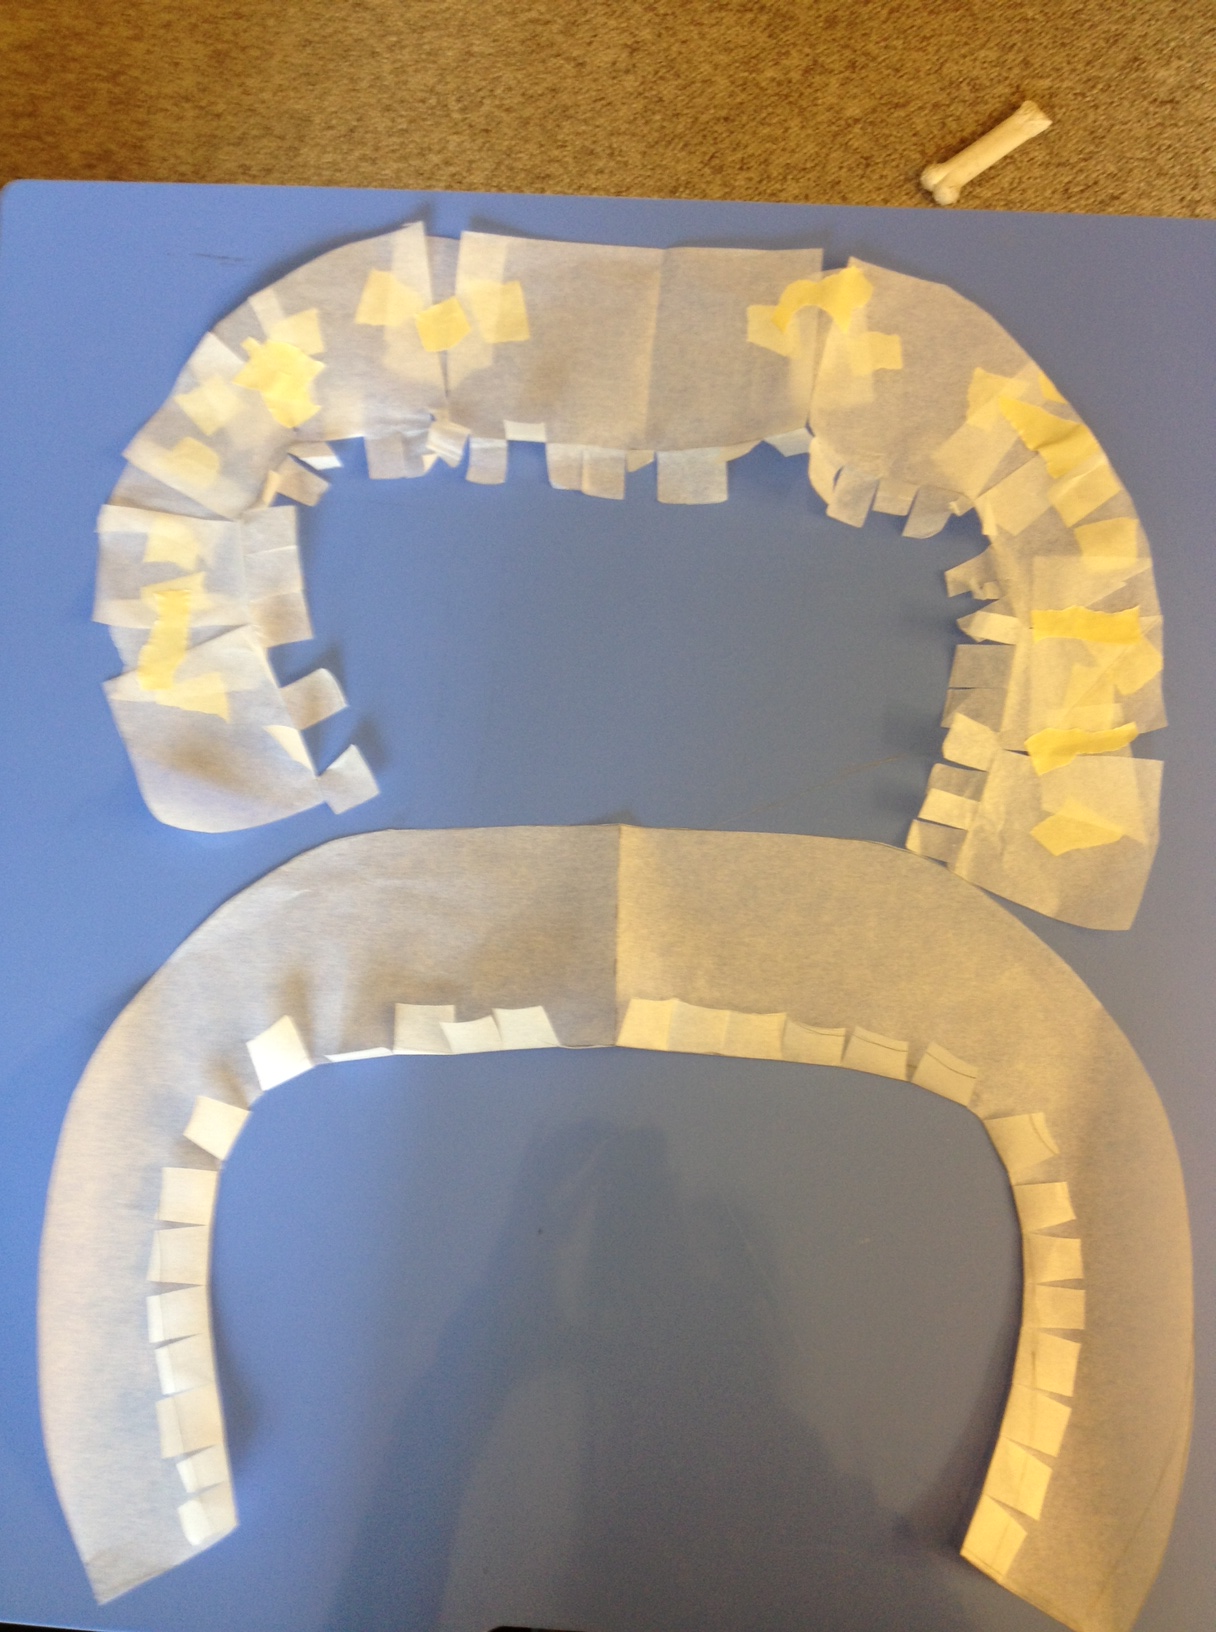
next the hood. that f***ing hood. that took some cuts and re-cuts. the end result is not perfect. lots of wrinkles at the top of the head and the face opening is a little too wide and shows my hair a little. will likely not have time to re-do it before dragoncon. maybe another day. for now ill probably have to sew in bobby pins or spirit gum down the edges. for the classic HQ i put the zipper at the back of the head, for my Twilek i had the bottom of the neck on the front be the opening. forgot to get a pic of the flat final pattern but i did get a pic of the twilek version which is the same shape with the top cut off.
the horns of the hood was another instance of many ways to do it based on comics, cartoon, fan art, and cosplays. i love me some big horns so for this detail i did want to stray from the classic look. i was channeling a black dragon’s style. much trial and error and foul language later i stuffed them and hand sewed the little bastards on.


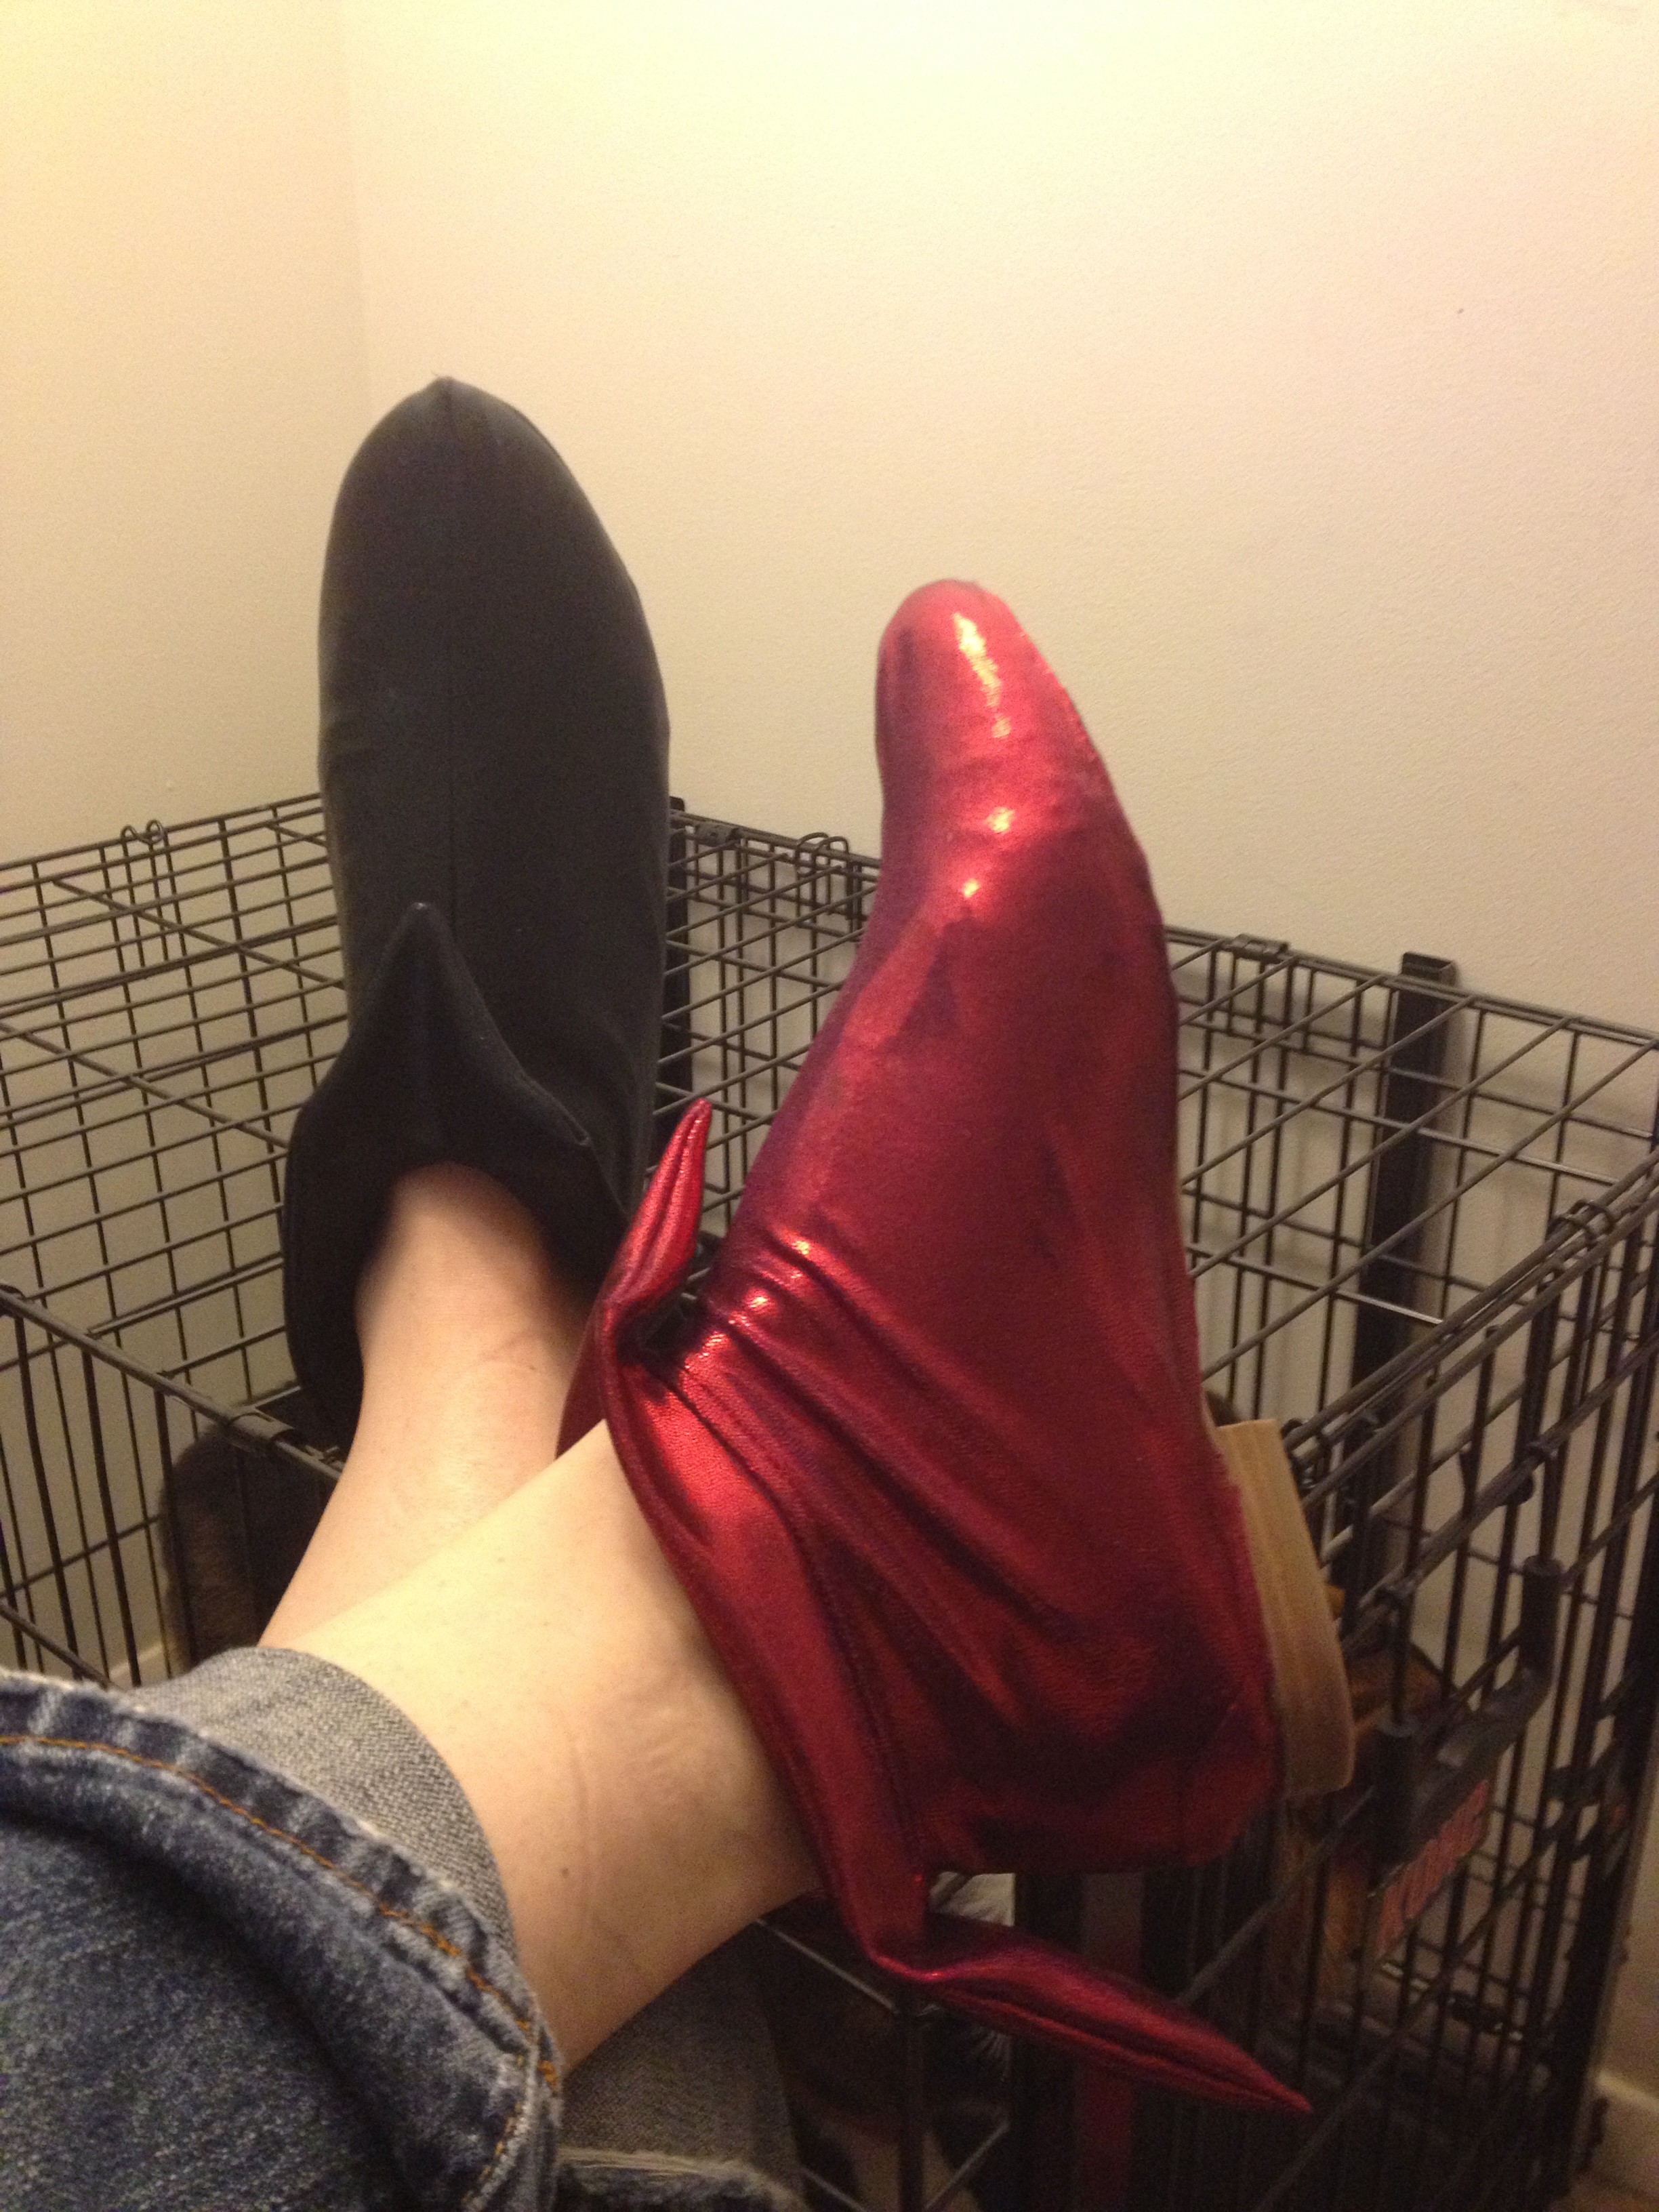
shoes. Harley has these darling little booties with cuffs on them. i knew the general shape i was going for – ankle height, flats (no high heels ever again at DragonCon for me. nope), with a pointed toe. i finally got lucking in the clearance aisle on the ugliest pair of white leather shoes in the perfect shape. zero guilt involved in permanently covering those things. i took a gamble buying a half size up and getting gel insoles to put in them. we shall see if that was a good idea at con.
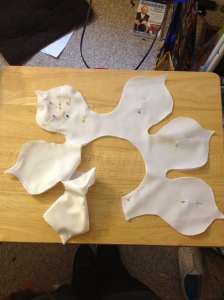
i traced the side of the shoe on both the inside and outside and made a pattern. sewed both sides together and made my cuff (pattern shape below – longer end to the back). this one i did sew right sides together and flip to give it more “puff”. then stitch cuff to cover and glued it to the bottom of the shoe just about the sole.
for glue i picked up E6000 – Super Stretch. seemed appropriate, dried clear, worked great!

so i have my bodysuit, bib, cuffs, hood, mask, shoes. thats a completed Harley Quinn. ill try and do a good complete pic if i have any time for a good makeup test. havent decided if ill invest in some Spanx to wear under the suit or go au naturale and let the imperfections fly. i doubt ill have time to make a big mallet. it seems like it would add a lot for pictures but i really hate carrying things around at con so i dont know if i would be happy with one.
next chance i get ill post about Twilek Harley Quinn, the Zabrak Two face, and Darth Joker.
Star Wars Harley Quinn
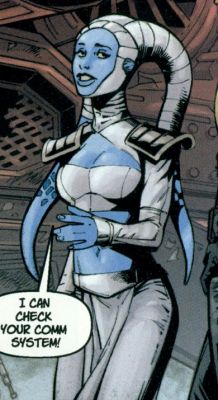
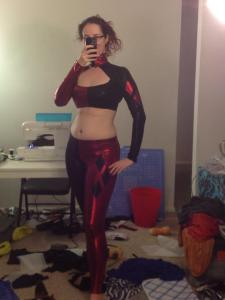
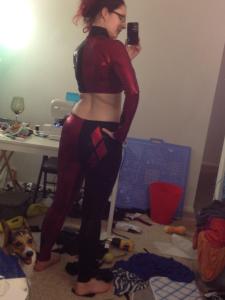
so for our Mashup group costume we have 4 sith characters mixed with classic Gotham/Batman villains – Poison Ivy, Two Face, the Joker, and Harley Quinn. I’m HQ. i thought of her jester headpiece and it made me think of the lekku on a twilek so it seemed appropriate. i looked at several of the Star Wars outfits in the movies and comics and cartoons and came up with an idea for a midriff top with a boob window essentially, a pair of leggings, various armor bits in Stormtrooper white echoing her cuffs and bib, maybe a cape, and stockings on her lekku. its pretty rudimentary but i took a selfie and used Paint to sketch out a couple ideas and see how they would look. initially my debate was mostly about whether to do a more stormtrooper like breastplate or something like Darth Talon.


It took a lot of trial and error to get the pattern right for the top. i had a hoodie top to somewhat base it off and bought a cheaper spandex to practice with. there was considerable time wasted trying to create my own legging pattern rather than using one commercially available. the bodysuit pattern from Kwiksew worked best.
here was the end result. i attached the diamonds the same way as for the HQ classic using HeatNBond and sewing close to the edges.
i bought my lekkus from “Twilek Pam”. Chucrew.com her lekkus are fabulous and reasonably priced (considering they are handmade and she busted her butt to make the molds etc). they should not be “cheap” so i resent that anyone may have harassed her in the past for “overcharging.” you aint getting a huge cosplay prosthetic for $30. ill leave it at that. i am very happy with my lekkus and will probably get another set so i can have two painted in different colors. i havent started my armor yet and im waiting to pattern the head wrap until i finished the headpiece for the HQ classic then i can just make one with the top cut off for this one.
on fabric: i ordered all my spandex from StretchHouse.com. as i mentioned they are awesome and sent samples for me to see what i was getting. they are also super fast! and the fabrics are the extra wide cuts so you get more out of it. with some loss from mistakes (was this the left side or the right side that needed to be in black?, uh oh the greater stretch was the other way so i just cut this huge piece wrong, well, that pattern doesnt work, etc) i have reordered twice to get more red and black metallic pin dot spandex. if i finish it all with that (which i really should) i will have produced a full HQ classic and the twi’lek HQ with 3 yards of black, 2 of red, and 1 of white (guess which one i screwed up on most). they ran at $12/yard when i ordered so that’s $72 in fabric costs plus shipping. coming from NY to maryland id get it in 2-3 days tops with their cheapest shipping. $36 per costume isnt too bad when you think about it. we can just ignore how time is money and what i spent on the *slightly* cheaper $10/yd silver spandex when i was testing patterns.
More to come =)
Harley Quinn, Star Wars, Mashups, and more…DragonCon 2014!
so for this year here’s the ambitious plan.
1. Classic Harley Quin
2. Gotham Villains-Star Wars Mashup – Twilek Harley Quinn Sith and Darth Joker for me and Kenneth plus two friends doing Red Hood and Poison Ivy sith.
3. SW Twilek scoundrel/mercenary
4. Skyrim Khajiit pair (yay something already done!)
5. Bitch Puddin’ (from “Robot Chicken” also already completed from last year)
1. Classic Harley Quinn

so for this and the SW-Gotham mashup i had my first foray into working with spandex! i was reminded the slow, hard way that using published patterns is a good thing, can save time, and will sometimes yield better results than making a pattern from scratch. not always but sometimes it’s the better way. it was just so with the leggings for the sith leggings. i have learned a valuable lesson.
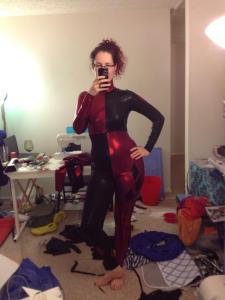
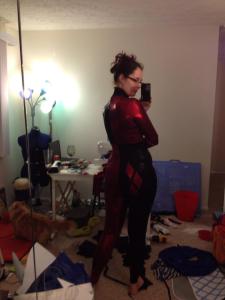
so through the recommendation of a friend i used StretchHouse as my spandex supplier. what is super awesome about them is you can request samples of their different types of fabrics. i knew i wanted to use a more metallic spandex and they sent me sheets of samples and it was FREE. so nice! i will reward this service with my patronage going forward. the black, red, and white spandex were beautiful! i used the Kwik Sew 3052 pattern for bodysuits and it worked pretty great with flipping the zipper to the back and some minor adjustments to the waist. hard part was always having to keep track which side of the body a piece would go on so i knew which color it needed to be. also paying attention to which way is the greatest stretch (because that has to go around the body and not lengthwise).
overall it was pretty easy. the most difficult part was definitely adding the diamond appliques. ive been looking to DJ Spider’s posts on facebook and the superherocostumingforum as the cosplaying Yoda. she posted her method and i followed that. (http://thesuperherocostumingforum.yuku.com/reply/81764/Spandex-Applique-ex-SpiderWoman-spiders-Wonder-Woman-sta#reply-81764)
main thing that sucked is i had to sew the body suit to get the placement right then rip the seams to be able to sew around the diamonds because the legs and arms were too small to fit around the machine. the end result was quite good tho.
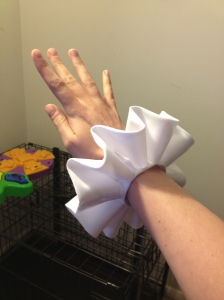 The next thing was making the frilly cuffs Harley wears. First i measured the circumference of my wrists and cut two 6.5″x4″ long rectangles. those were sewn end to end making a short tube, then i folded in about an inch on each side and sewed right along the middle. with such a tight little circle it was kind of a PITA to sew down the middle. suffice to say i just shoved the part of the loop i wasnt sewing aside and it wasnt a pretty process but got the job done. in the end the cuff itself will be barely visible once the ruff is added. the ruffs were made similarly by cutting rectangles that were about 42″x4″ (those i wanted 2″ finished width also). i sewed them into big loops then folded them in half and stretch/zigzag stitched it together. i had planned a 10 loop peaks on each side of the cuff. the easiest way i could come up with to plan/pin where the loops needed to go was i mark 10 evenly space ticks along one end then marked the other end landing between the upper marks. i put the cuff over a roll of paper that was about the right width, then rotated and pinned to ruff back and forth until it was all taken up. i initially started handsewing the ruff to the cuff in a continuous fashion and that was taking WAY too long. i bailed on that and just tacked it in the curve shape at the peaks only and that was great! and fast. i worried how well they would stand up and it just did without any special treatment. quite happy and proud of the cuffs end result.
 In progress right now is the bib. the main thing i wanted to accomplish is to not have the end product resemble so many saggy bewbs. some of the shapes ive seen in the comics, fanart, and cosplays look great, and some just make me think of old lady boobies. i mapped it out by measuring the dimensions i wanted the bib to take up: circumference of the neck, length from neck to shoulder, length from neck to just above my bustline, width from armpit to armpit. i drew that rectangle-with-a-trapezoid-on-top shape out so i could get a sense of how long they should be and how wide to have 3 in front and 3 in back. i went for a spade-like shape to hearken to playing cards and have a clear separation from the balls at the end so they wouldnt look like nipples. =) i traced and redrew with slight mods the shape i came up with and then lengthened it by about an inch or so for the back ones. that is cut out now and waiting for sewing. i may or may not go with the idea of flipping it inside out because as you see the shape is largely lost. we’ll see whats up when its done.
What’s left for HQ classic? the jester hood, gloves, the shoe covers (shoes already bought!), sanding and painting the mask, maybe an oversized mallet.
To be continued…
yup i did it again… how the Khajiit were finished
so since my last post i pretty much did everything else for kenneths costume.
so we made kenneth the Novice Robes of Destruction. like here:

the fabric i made the tunic and tartan out of Cotton Duck fabric. its thick and gives the weight i was going for. i bought a sky blue and a natural/wheat color for the trim. then to give it the muddier color i tea-dyed the ever loving hell out of it. for the record, tea dying does not yield a strong effect. i had to use A LOT of black tea. and i steeped it a REALLY LONG TIME. seriously, i dyed it twice with boiling water, 200+ bags of black tea, and steeped it for an hour or two each time. you can look up instructions for tea dying all over the internet. i used the “tub dying method” and used a laundry sink and carried the boiling tea water down to the basement. it was a scary process. that sink will never be the whiteish color it was originally again. or maybe it would be if really really tried with bleach. so yeah the tea eventually dulled and browned the blue and natural cotton to a more accurate “dirty” blue and tan.
 the tunic i made in the double fold T-tunic style. for this you fold the fabric in half lengthwise. then fold it again widthwise. you cut your 1/2 tunic shape out with the center lined up on the fold. this makes it where the sleeves are fully incorporated into the body and all you have to do is sew up the sides. very very easy.
here is a link with more pics like above for how you do that. http://iollan.com/archive/rencester/new/tunic.html
the pants were elastic waisted and no more elaborate than pj pants. somethings you just keep simple.
we ordered the cloak pin online.
the mantle and belt were made out of leather. we found a piece of beautiful brown leather with a variable color and patterned with paper bags to get the shape i wanted. then i finished it with carnauba cream to give it the rich color and smooth finish. kenneth tooled the celtic knot pattern on the belt and dyed it himself. the pattern you can buy a stencil of at Tandy’s (its where we buy all our leather crafting stuff). i used rubber cement to connect the seamed and “stitched” the details on in a thick hemp-y threat. many holes were punched to make those details.
here is a pic of the finished mantle pre-stitching and the shape of the collar. it took a lot of trial and error to get it.

the lower wrap part of the sleeves were an off white cotton gauze that i wrapped and sewing tacked the shape and attached to the tunic sleeves with hook and eyes. in atlanta at labor day weekend the less layers you are wearing the better.
after i finished Kenneths major pieces i sewed in snaps to make them all stay in place without safety pins or constant re-adjusting. snaps are your friend.
after that i finished the details i had left to add to my own costume: the bracers. the Thalmor bracers are pretty awesome with spikes and multiple shapes. i was using the very last bit of that fantastic european vegetable tanned leather. unfortunately i had spilled the brown dye i originally used on the mantle and it was discontinued by Tandy. i made a passable color match with layering black over a lighter brown. the spikes i made out of sculpy and attached to the bracer with thumbtacks and rubber cement. i dont know if ill use sculpy much in the future but for this it worked well. getting the shape right and then trying to duplicate it several times took several hours. i am not a fast sculptor.

 here are the bracers pre-dying. i was a little sad to dye it and paint it since the tooled leather was so pretty.
the best solution i could come up with to make the bracers easy to take on and off without having to relace them each time was black elestic cord. the two pieces were connected with rubber cement again.
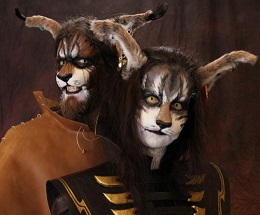
here is the end result at DragonCon
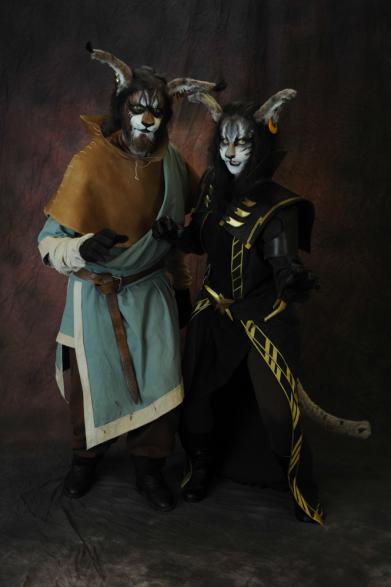
Paint. for dragoncon we used PAX. pax is prosaide prosthetic adhesive (yup glue) mixed with acrylic. this allowed me and easy and cheap way to get several colors and boy did it hold up well! you could scratch, sweat, move, wear glasses over it and take them on and off numerous times and it didnt budge. not even when it was 1 am and you were tired and wanted it off. i had prepainted the prosthetics but application and dressing and hair for the two of us still took 3 hours. removal took an 1 1/2 hours. and it was a little painful. i was using the telesis brand prosaide remover but even so it was a lot of rubbing glue off your skin and it was slowwwww.
we have since used a mehron creme based paint at Awesome con, and it was a little faster to apply and a lot faster to remove (about 30-45minutes). as a tradeoff i would rub off on your fingers if you touched it (even with final seal applied over it). i think we will use the mehron again next time for the comfort of getting out of costume.
amendments on previous posts: mainly the things i would/will do differently in the future. for kenneth and my ears i used thin craft foam with a line of wire at the bottom to shape it. whenever i remake these things i may use either a thicker piece or multiple layers of thin craft foam and more wire to give it more stability and shapeability. Kenneths ears got all sad and floppy after only a couple hours. i ended up rigging a piece of black thread between them to hold them at attention. i could also consider wonderflex but then it wouldnt be flexible.
here we are at Awesome Con in DC. found a great little courtyard at a nearby hotel to get into character.

Khajiit ears & face, 2.0
a new khajiit, a new pair of ears. for K’s ears, i wanted to give him the lynx-y tufts on the ends that i wanted to give mine last year but didnt. of course repeated the same process without the trial and error didnt yield the same results with less time. that would be too easy. with his i dont know why but they dont want to orient the way i want but it will do well enough and i may cheat a little with strategic bobby pin placement. i found a beauty supply store to buy the hair for the tufts and hot glued them to the unsealed folds at the tips. i was able to beef them up a little more and trimmed for a better shape after the pics below were taken but you get the idea. i am pleased with how it turned out for the most part. i could really critique the up-close detail and errors but unless you are inches away they acquit themselves well i think.
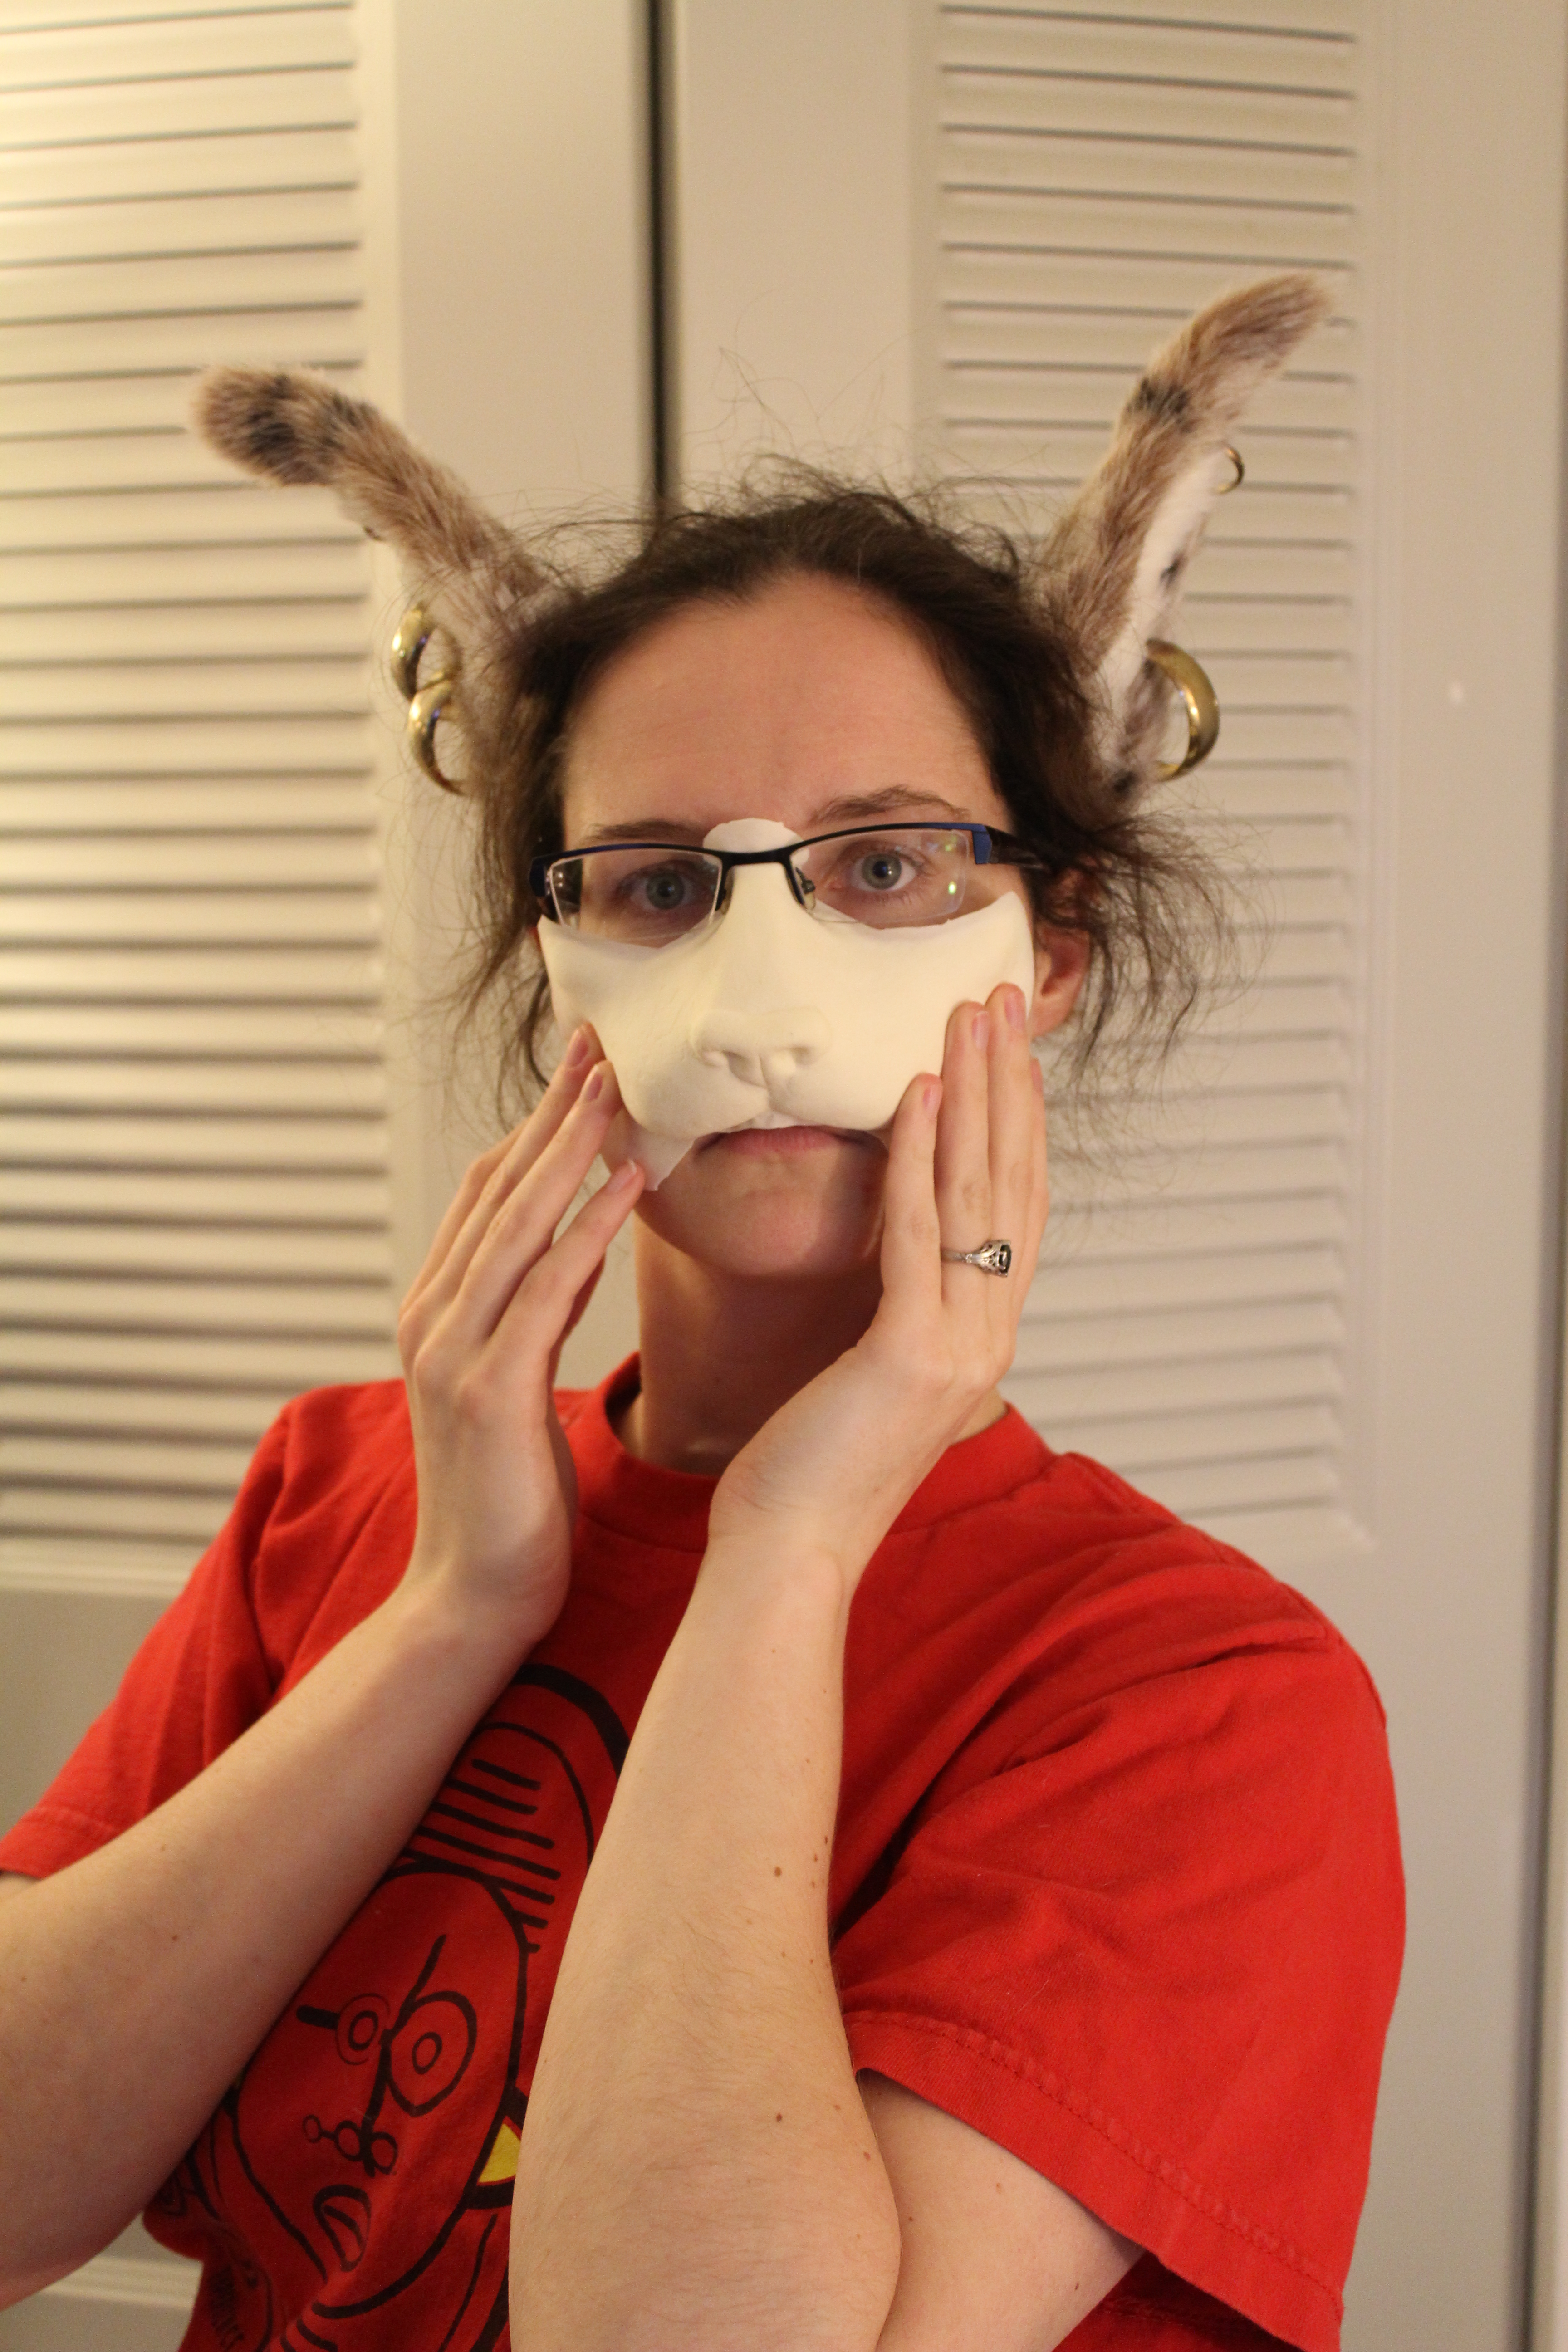
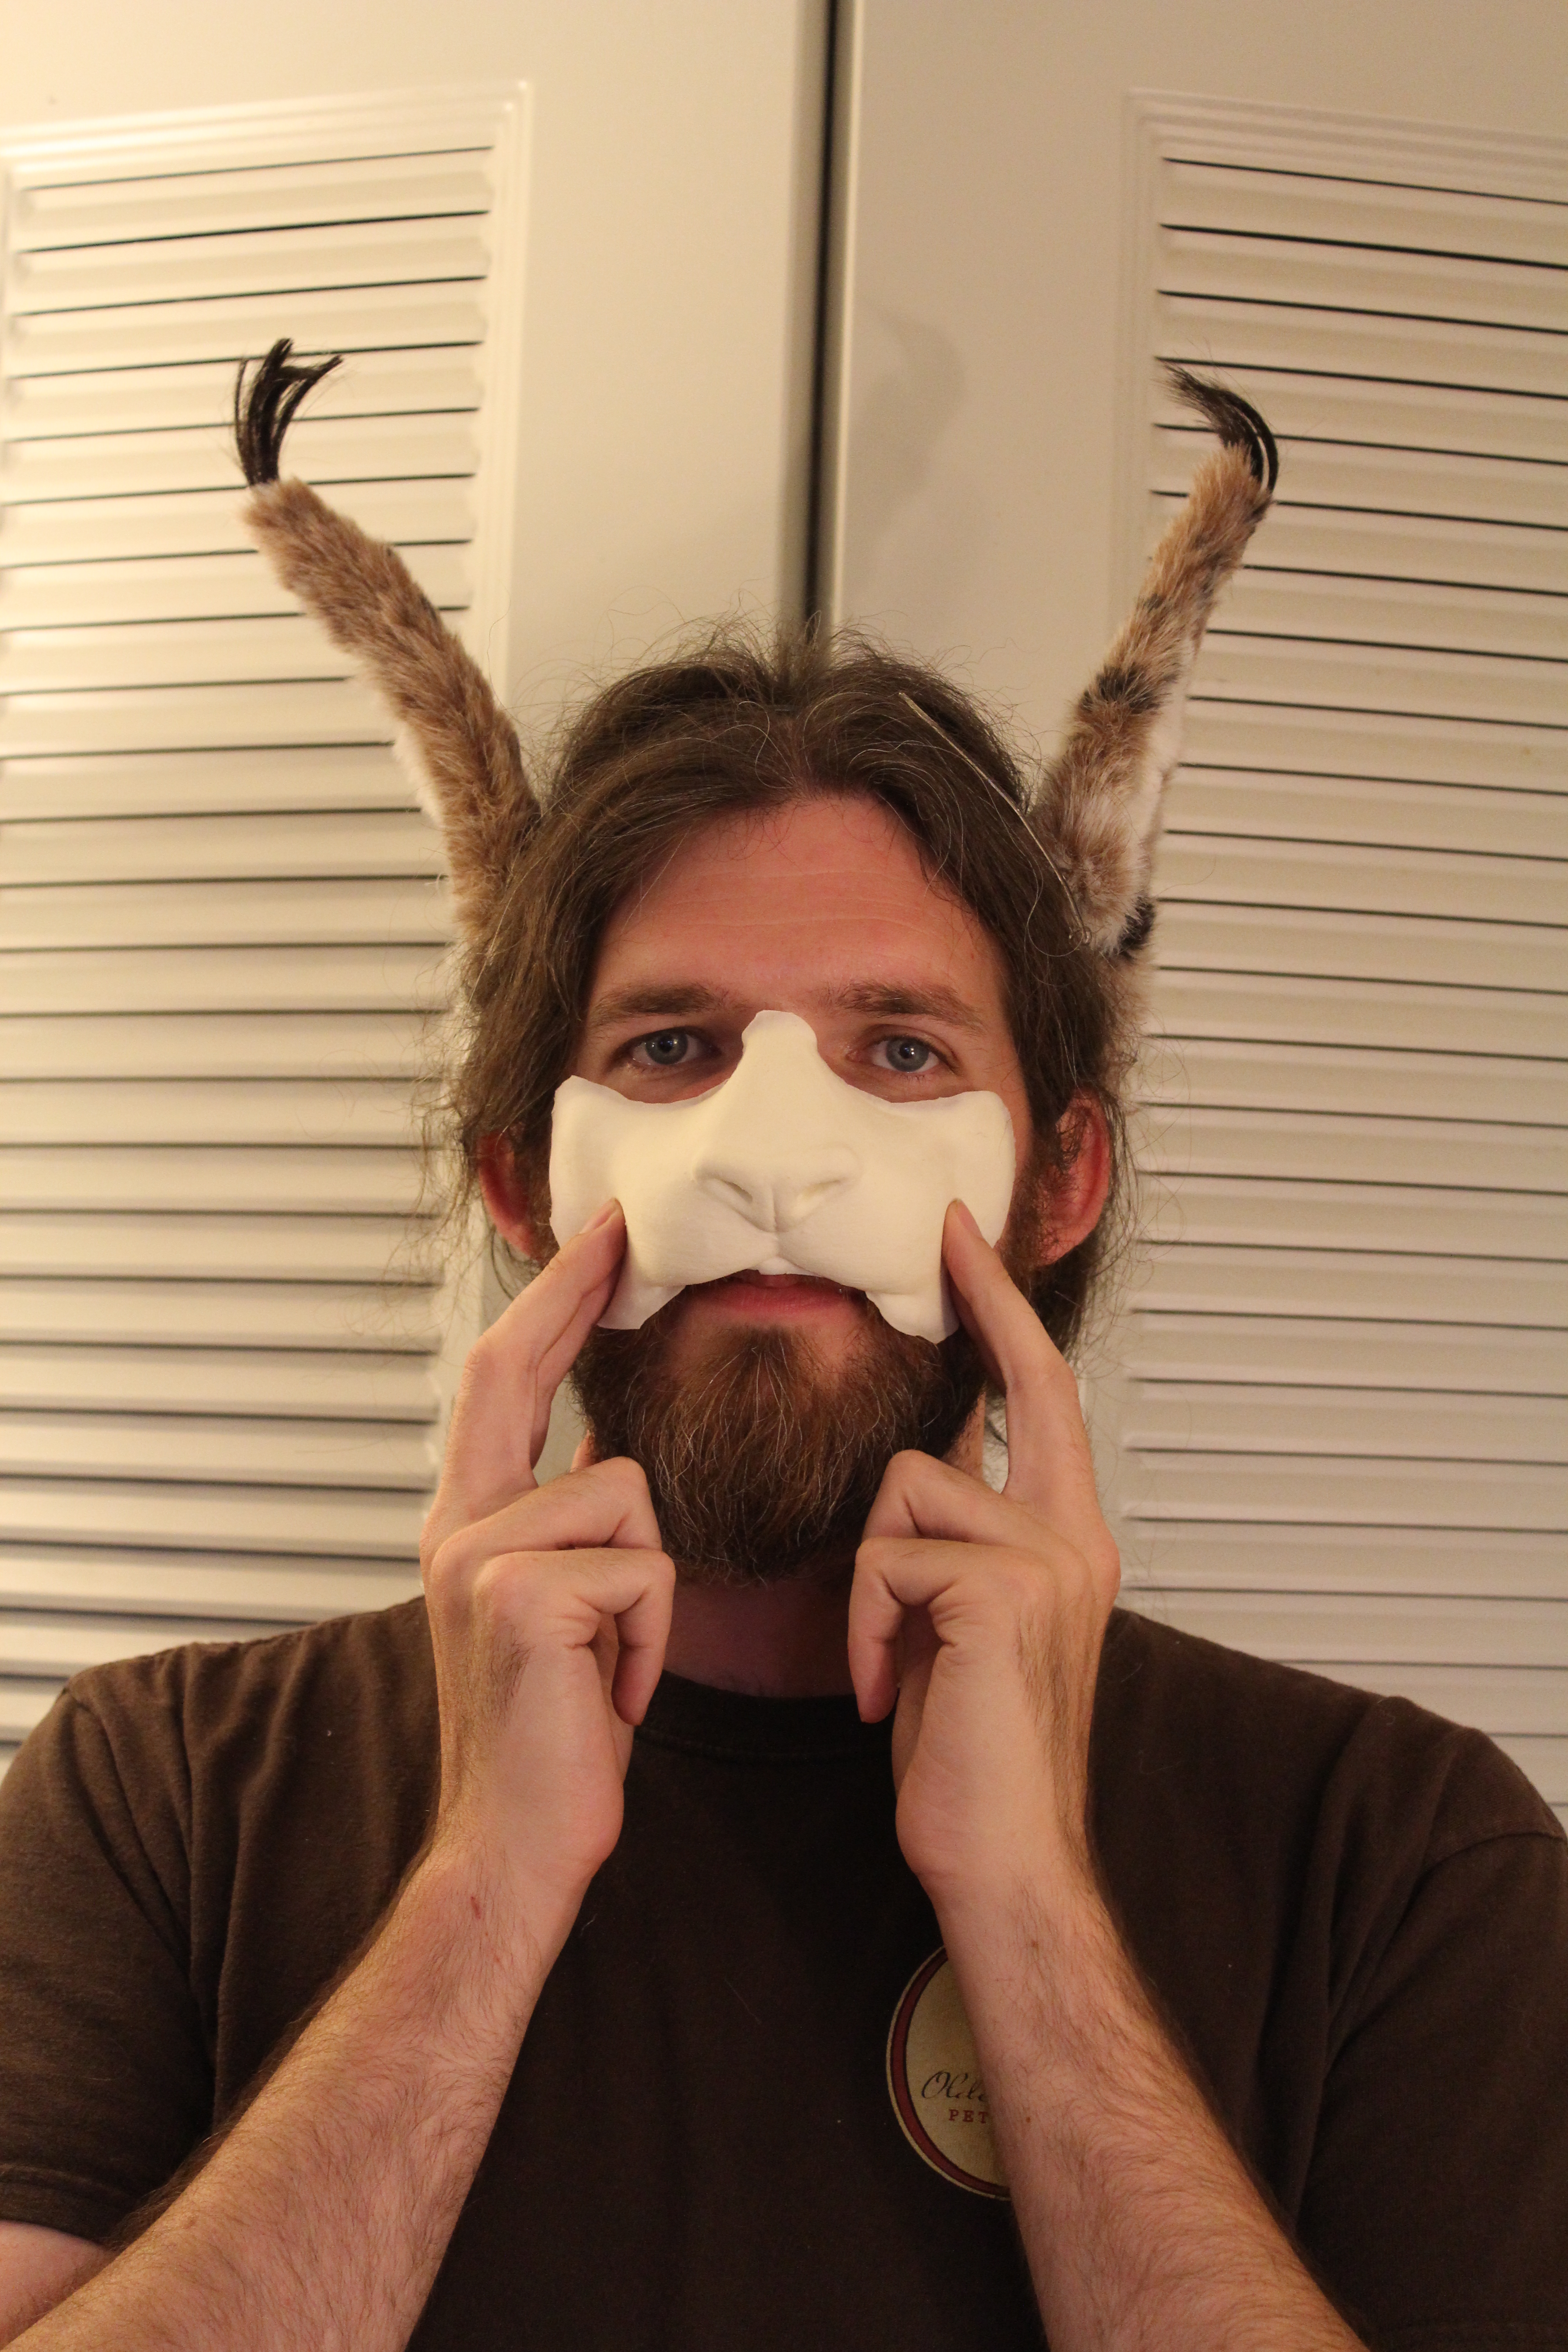
we also took some pics of the prosthetics we will use this year. again we purchased from NorthFur.ca and shipping seemed much quicker this time. rather than the full face with the more humanoid nose (Lyonshel lady cat face which i used last year) we went with their Small and Wild cat noses. his is the wild and is a little larger than mine. the bigger one just seems disproportionate on my face but looks perfect on him. i think its something to do with the size of the nose being wider than my eye distance and my mouth.
of course without paint it doesnt look like much but im excited. i really doubted my piece last year would look good at all until it was on me and fully painted and then it finally, almost magically, looked awesome. know it looked terrible until the end makes me hopeful that altho these arent impressive now, i can make it come together. i do miss the nice brow however but maybe can get the same look with contouring.


in the last few days/week ive cranked out a new pair of pants for K, finished the ears, cut and gotten halfway through handstitching his leather mantle (thus the sore and soon to be blistered fingers), made the lower arm wraps for K, and gathered more materials for the remaining bits.
still to do: finish leather mantle, make bracers/gloves for Thalmor set, order dye for bracers since what i had spilled last year, prepaint the prosthetics, possibly glue ribbon where i painted the back detail for the Thalmor robe last year, make some sort of ear covers for our real ears so the hair doesnt have to be arranged SO carefully (its a PITA), maybe make gloves to paint kitty hands on so we can have the pattern on them but not sweat to death or have to paint it and remove it each time, make the headband for the Bitch Puddin’ costume, possibly make boot details for my shoes to make them more Skyrim appropriate and have a more complete look, add snaps or hooks to the lower arm wraps to attach to the robes, print out some reference pics for the costume contest, maybe pic out a costume for my mom to wear cuz shes joining us and shes not afraid to dress up too (YAY!!!)… theres more but if i think too hard about it it will make me sad.
K is working on the belt for his costume and was trying to create a handheld spell effect but it doesnt seem to be working out unfortunately.
too much to do so little time. will it all come together? we shall see
Helpers
because my fingers are tired i figured i could make a quick post about my darling “helpers” who are usually in the room with me while im crafting. they make sure none of the materials i am actively trying to use run off. here are some pics of them in “action.” my boys love crafting time. when not sleeping, Tyrion will also bring his own project (a Nylabone) in the room to work on.
Crookshanks
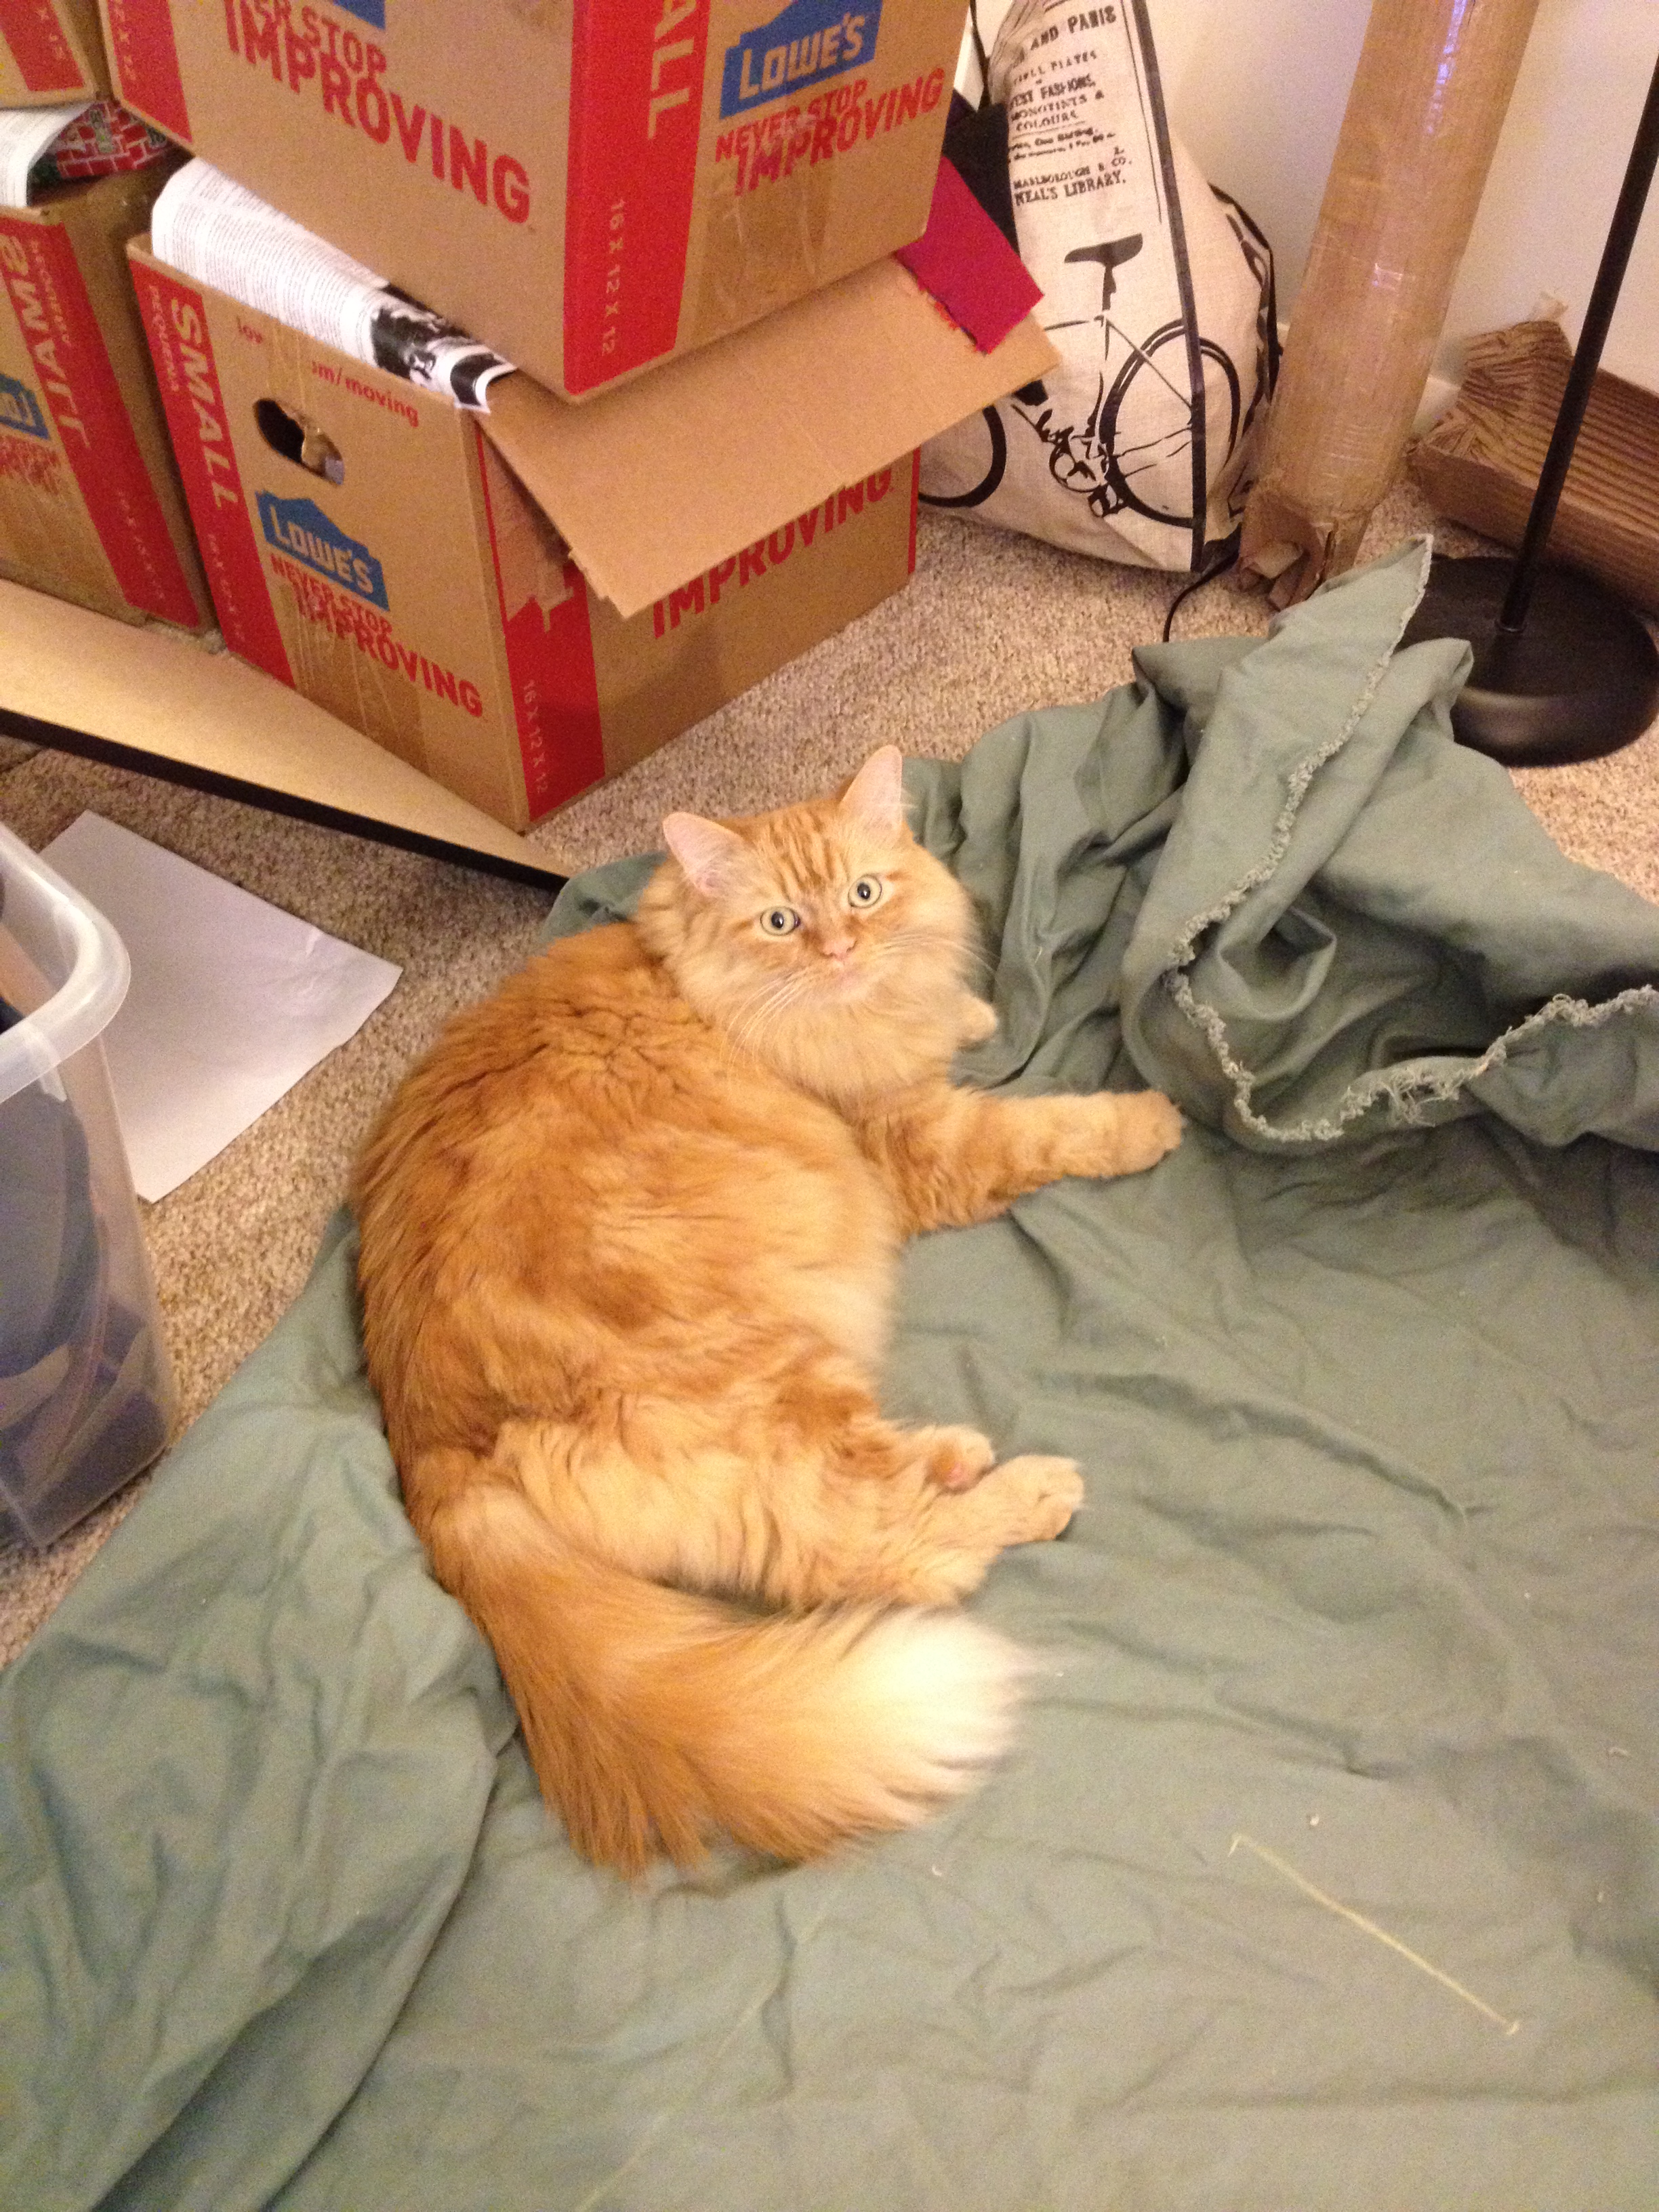
Faust

Tyrion

Thalmor belt buckle and accessories
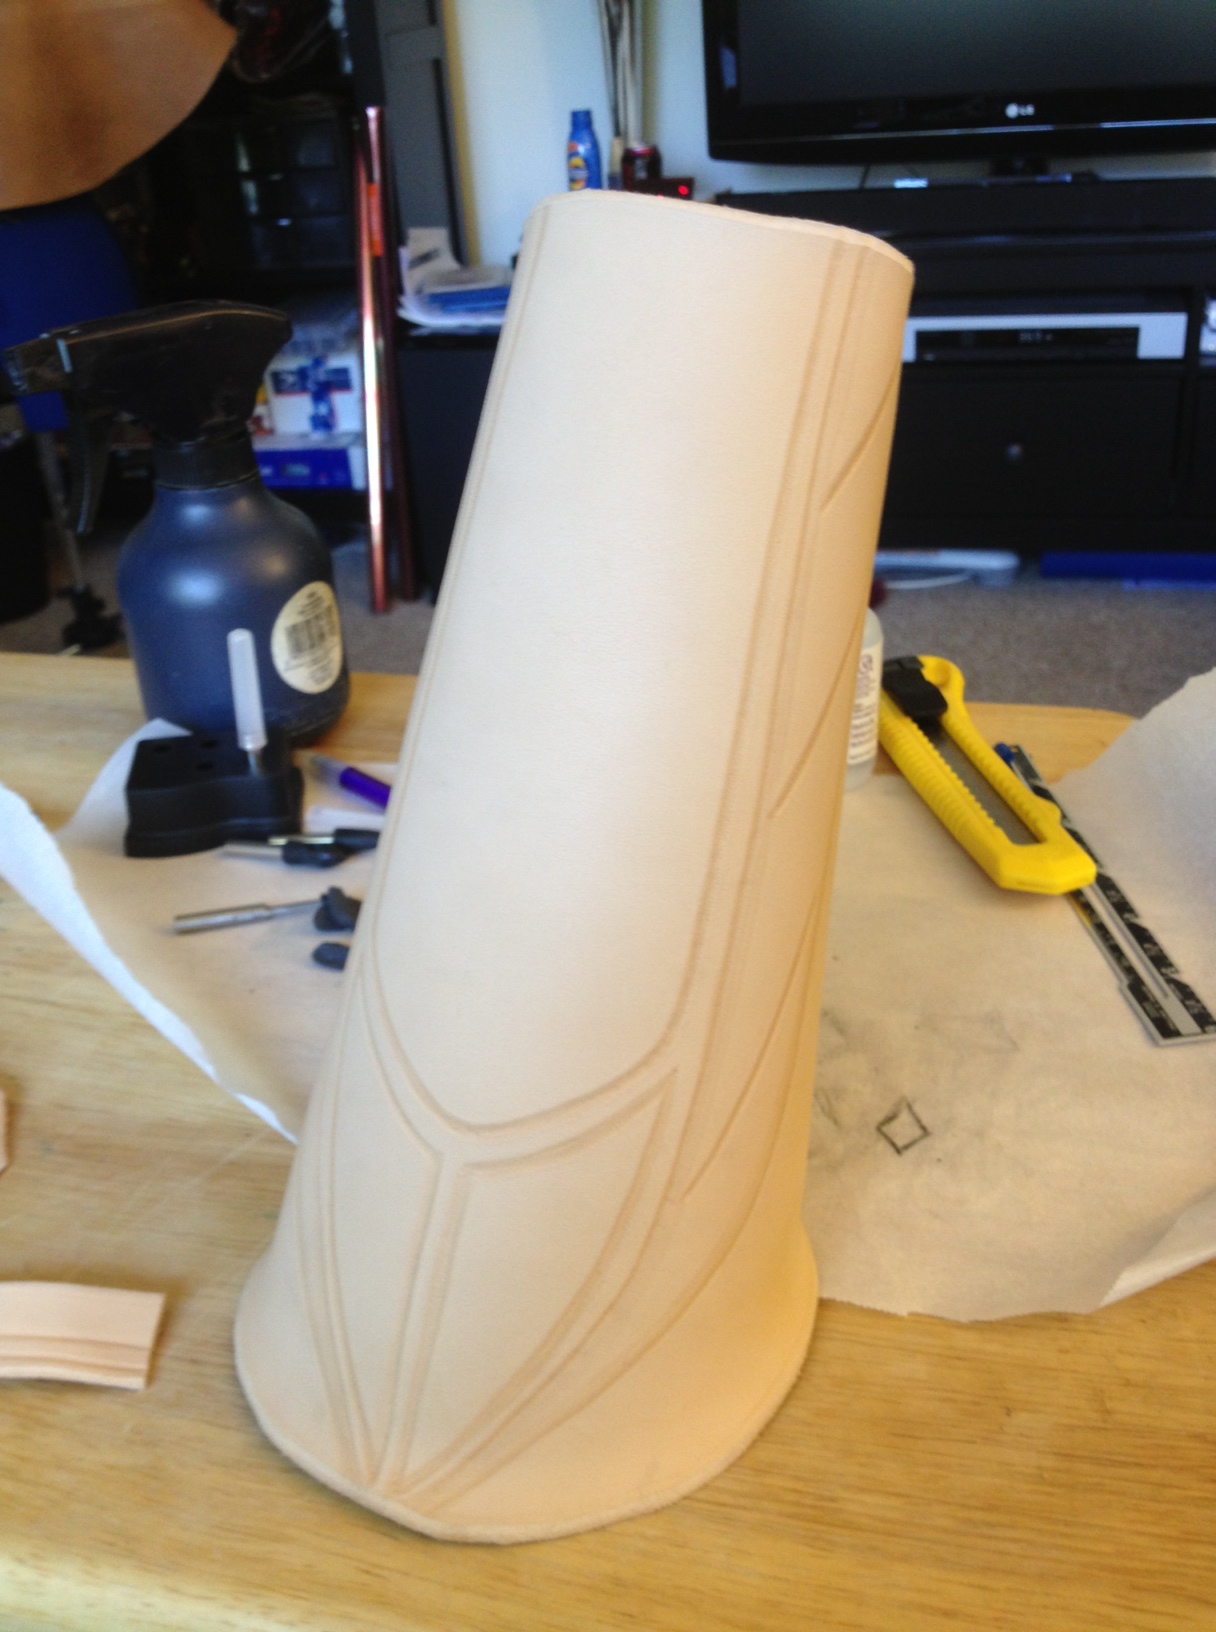
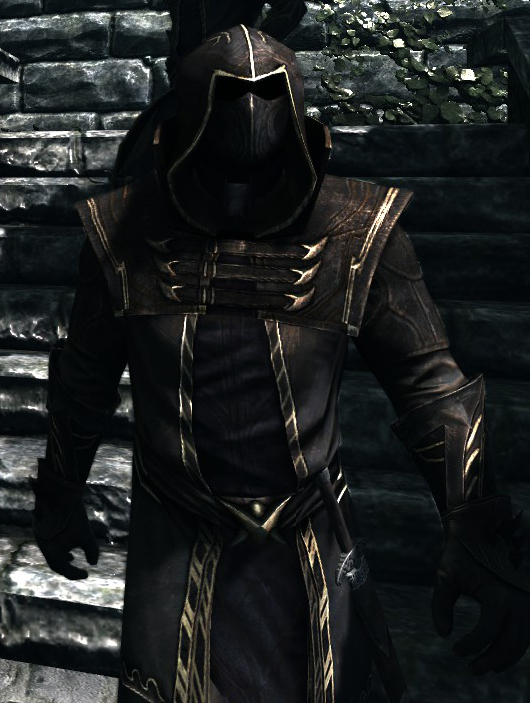
so im kind of working in a flurry to get all the costuming done before dragoncon. mostly constructing my husband’s khajiit in Novice Robes of Destruction but also remaking/finishing the details of my Thalmor robes from last year that were not made to satisfaction due to lack of time. this year im also working with the wonderflex we purchased last year for costume armor. in the images from the game the buckles on the chestpiece and belt appear metal. i originally made them out of sculpy clay which once again was a disaster. i couldnt get a consistent shape and the pieces broke easily. they survived well enough for the con but since im entering the costume contest this year, they would definitely not do.

for using the wonderflex i primarily referenced the tutorials made by the super awesome cosplayer – Kamui. http://www.kamuicosplay.com/tutorials – in short, cut the pieces out, heat them, sandwich them around craft foam, shape them, allow to harden, prime with 2 coats of wood glue, paint. tada!
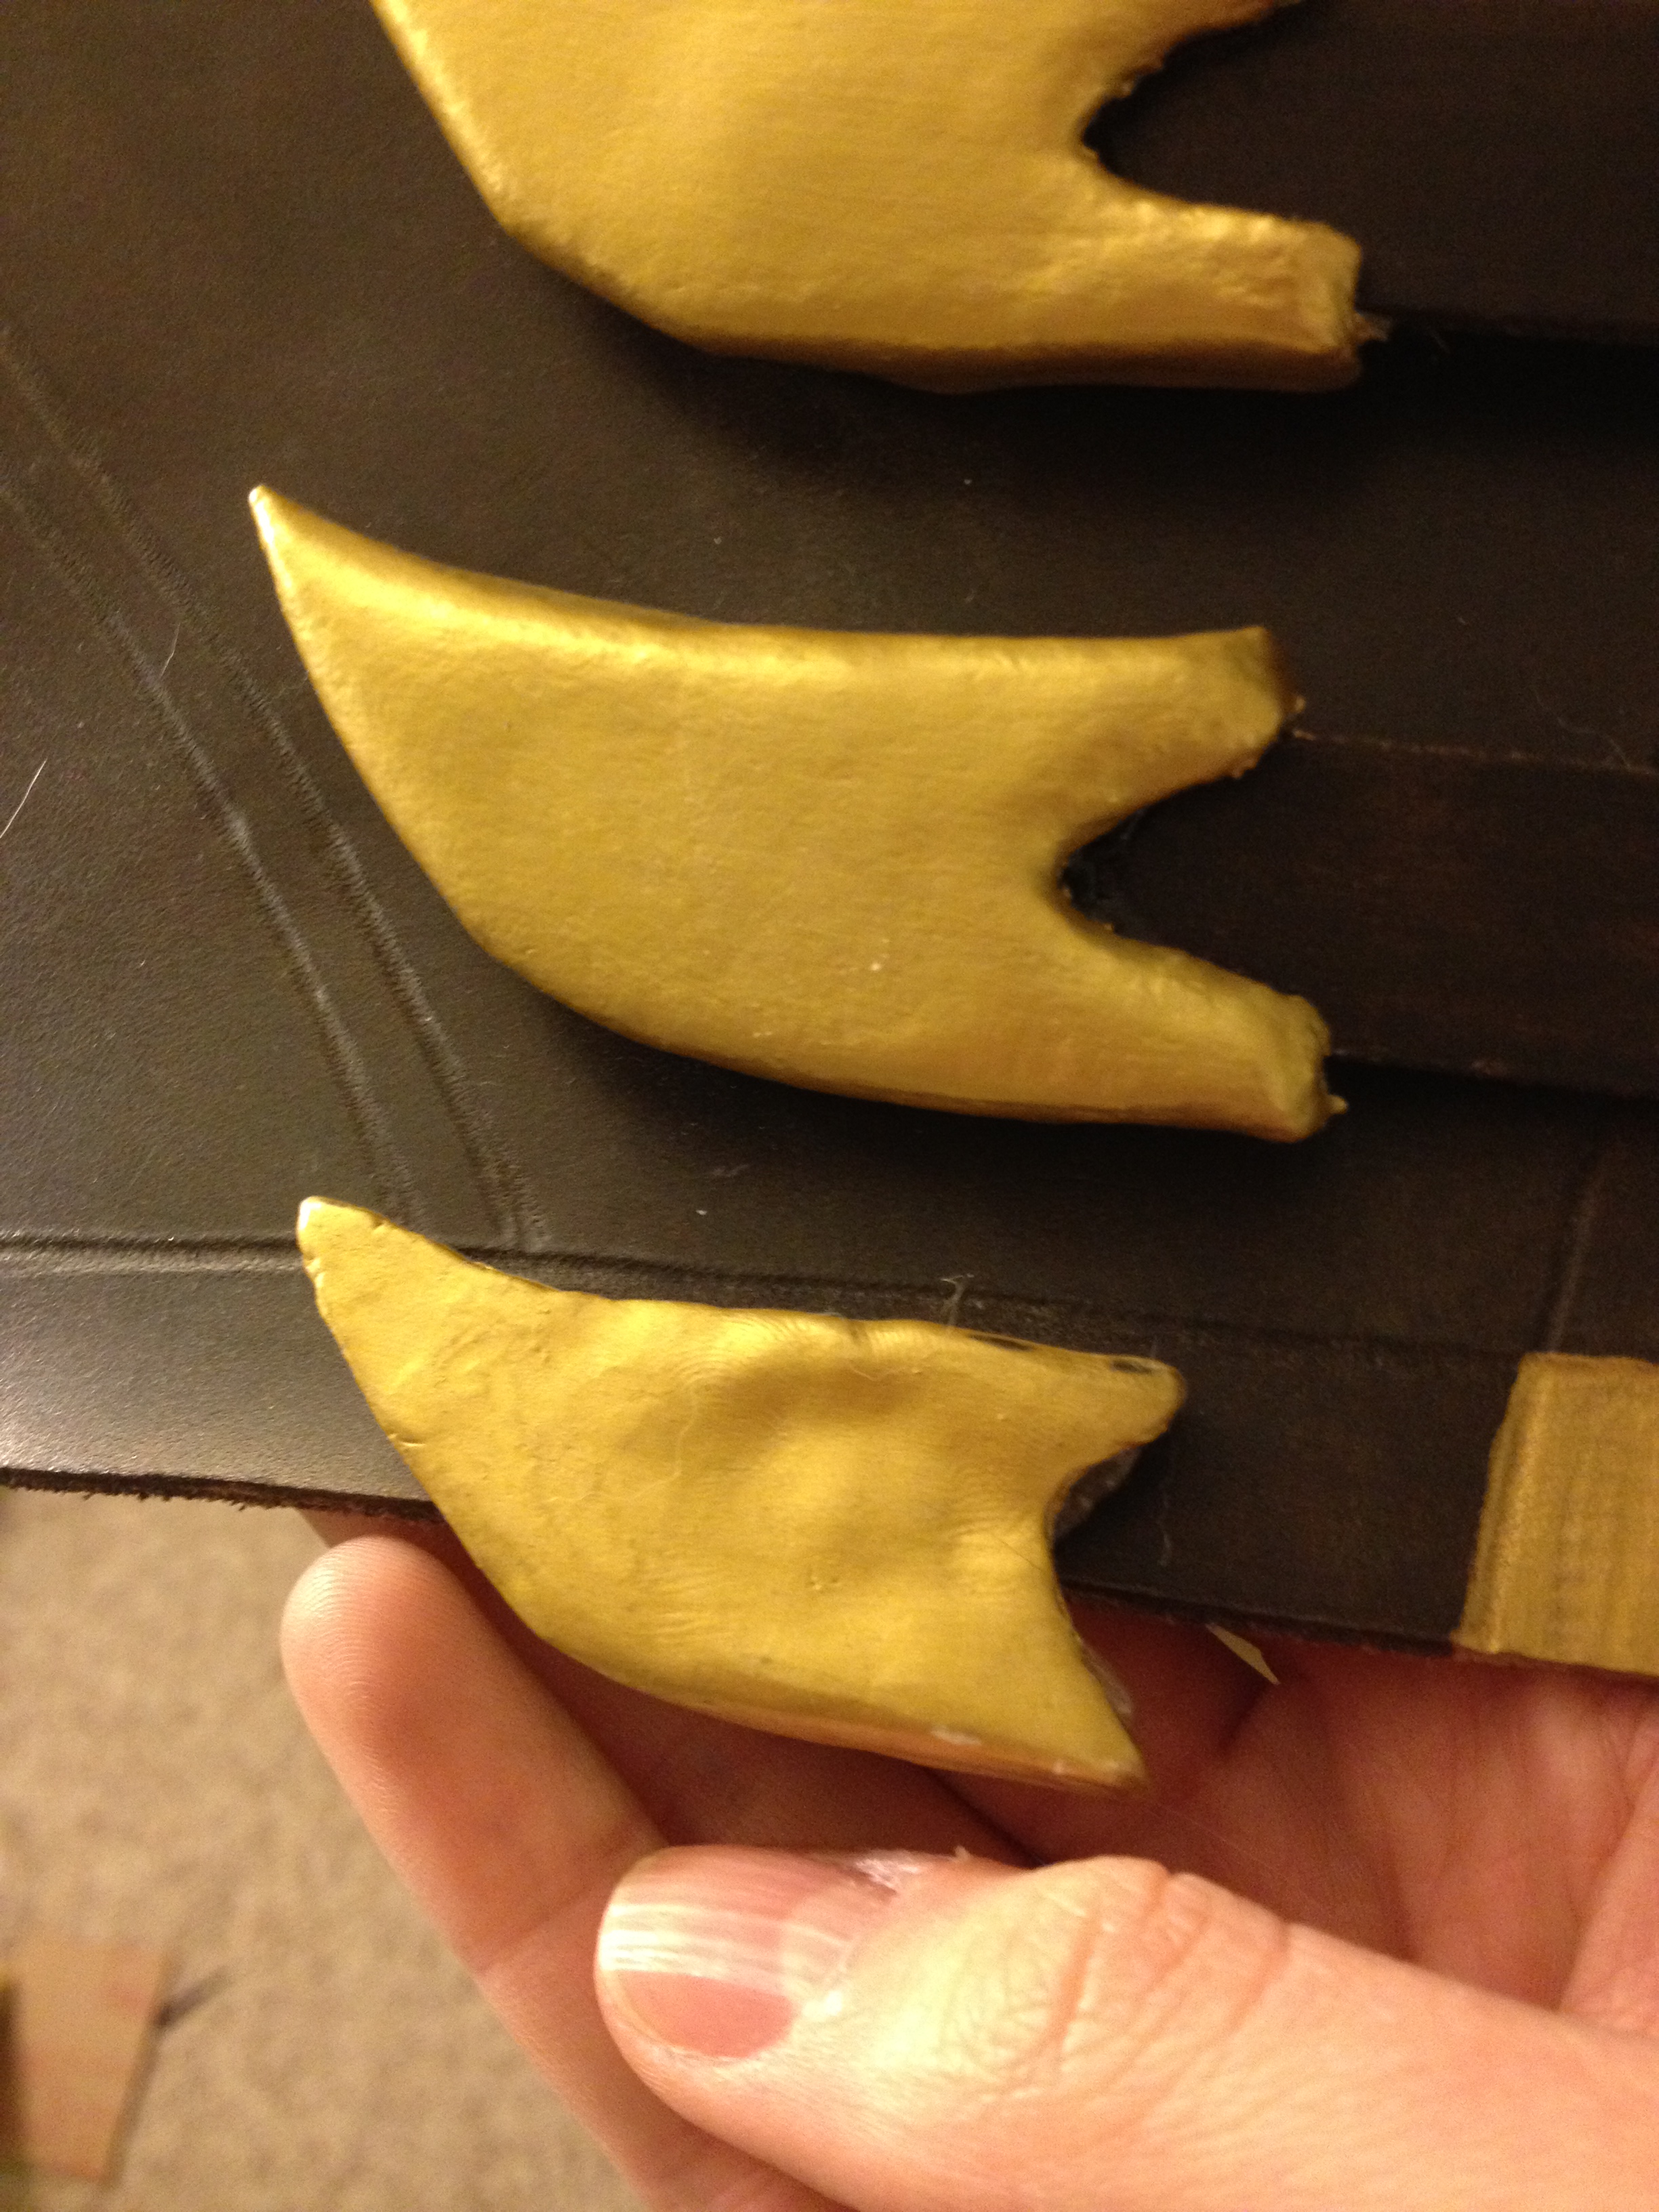 so i tried to cut my pieces in a consistent shape, used craft foam for stability as she does, and shaped them around the existing straps. once dried and hardened i attached them to the straps with epoxy to make sure it stuck well enough to survive me yanking open and closed the heavy duty leather snaps. in retrospect i should have primed with the wood glue and painted before this part, but i didnt. so i tried to tape the best i could and was mostly successful not getting gold paint all over my leather straps that were dyed with stain that i no longer had (remember to tighten the lids!) looking at the images from the game, i suppose they should have had more of a curve to them but im generally happy with what i made.
next was the belt buckle. it was more complicated being fairly 3 dimensional and vaguely star shaped with some recessed pieces and so on. so i made a basic framework with the foam glued in layers and then shaped the wonderflex over it. it wasnt very defined originally and there were some gaps so i added a second layer over the center area in 3 pieces to really define the lines and i liked it. add glue and paint and snaps to attach it to the belt and DONE.
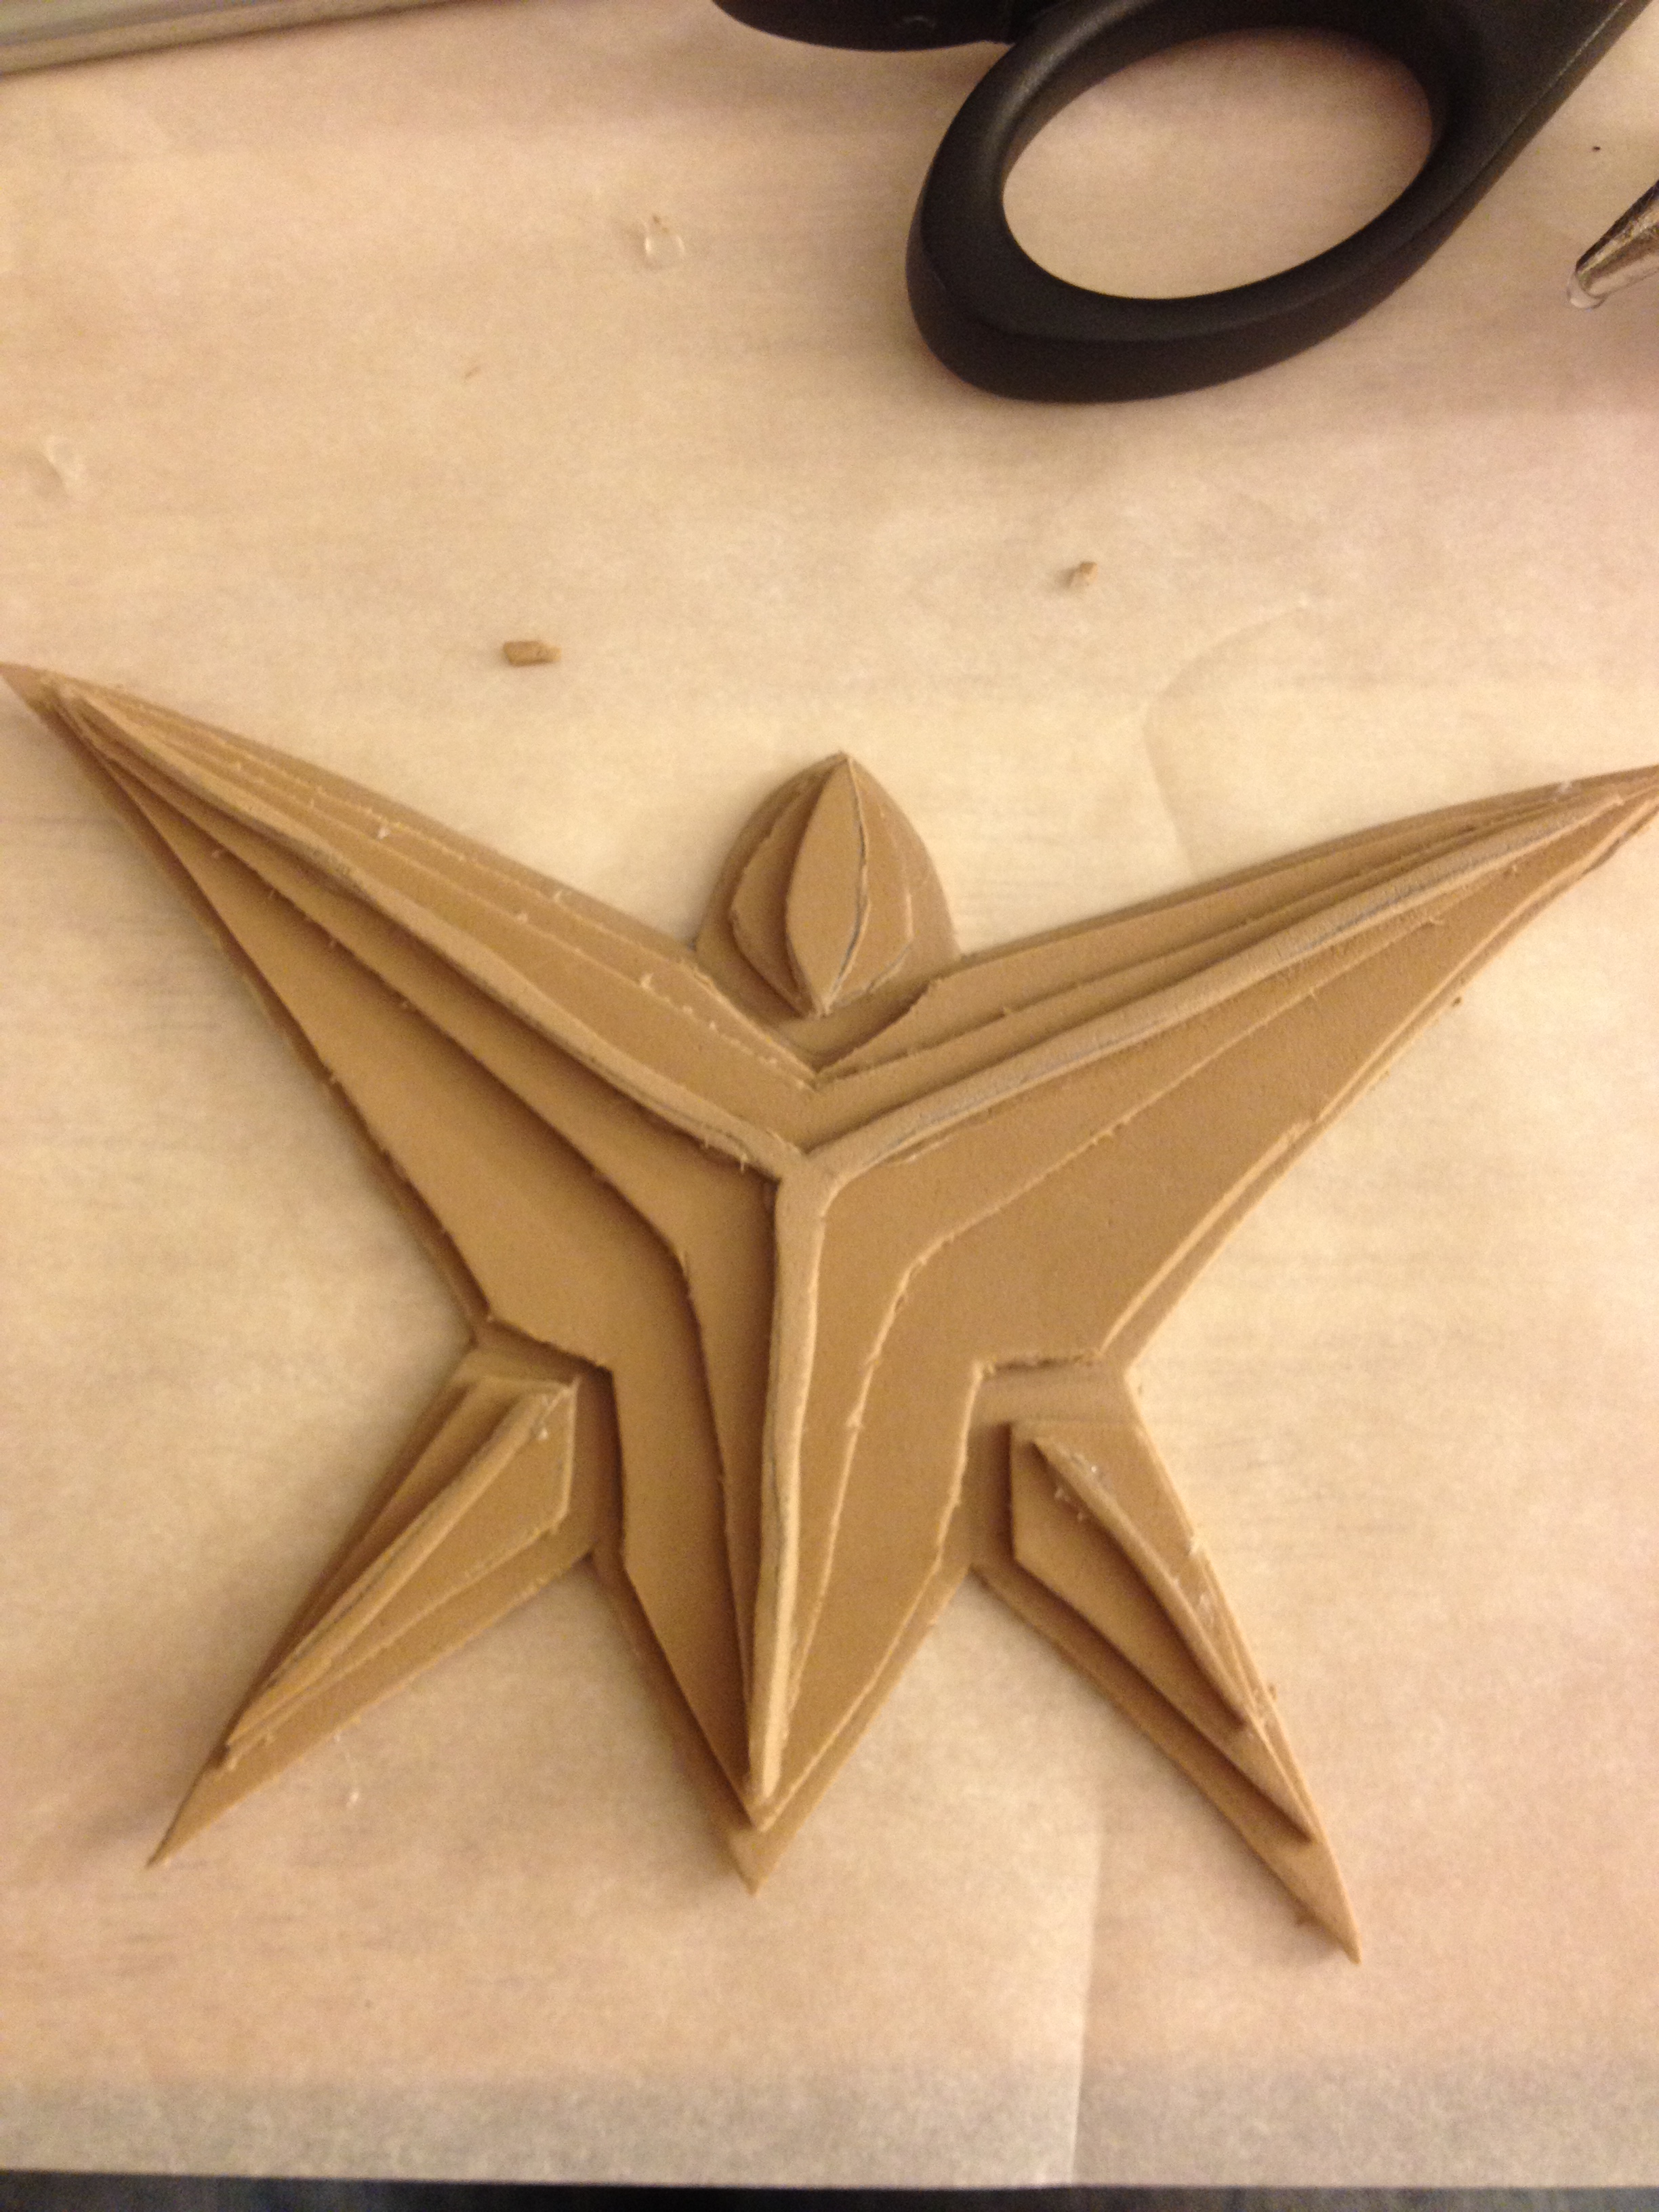

as you can see comparing the old buckle to the new, BIG improvement.


Dragon/Alien makeup
 So there was a scifi themed party held on July 4th that i wanted to go to. i will never pass up an opportunity to really costume it up but i didnt have much in my closet that was “scifi”. i lean a lot more towards fantasy. so i decided to be a reptilian alien which really was more of a dragon but WHO CARES?! in doing the makeup for this costume i experimented with three main techniques ive never used before: covering my eyebrows, trying to use contouring to really alter how my face appears to be shaped, and painting on scales.
Covering the eyebrows: i used the gluestick technique and primarily followed the tutorial by Petrilude (http://youtu.be/vb3D-afzKEc). he is my makeup hero. so layers and layers of glue and either foundation, powder, or concealer. i wasnt overly thrilled with the final effect, in my opnion it passed the “10 foot rule” but up close they were not hidden. it worked well enough for what i needed since i was gonna paint over it anyway.
C ontouring the face: here are the pics of whati did. essentially shading my face to
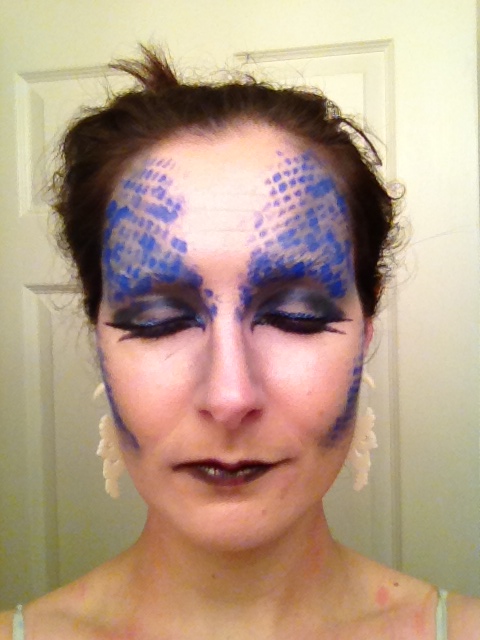
 create the appearance of differently shaped temples, a more gaunt face, and put more blue in my skin tone. again, i feel like i need a lot more practice and education on how to create the effect i wanted but it was good enough for going under the scales and walking around a dark club. i used my blue eyeshadows in a few different shades for this. the eyes i kinda made up what i wanted using a lot of “alien makeup” pictures on Pinterest as inspiration, especially for the shape of the liner under the eye. apparently thickly lined under eyes = inhuman. i was actually very pleased with the eye makeup. got a better shot of it at the end of the night when i took a closeup of my scales (below).
The Scales: Basically i used the old paint over stretched fishnet pantyhose trick to make my scales. Again i looked to a Petrilude tutorial for guidance and it payed off. (http://youtu.be/s1IpouKditM) in the video he shows how to use a frame you cut out of cardboard to stretch the hose over and that way you dont need to grow 3 new hands or use a friend to keep it stretched while you paint. great if you are a makeup control freak. still had to recruit my husband for my arms and back but it was pretty nice. paintwise i used some Ben Nye MagicColor water based paint i had lying around from my old Draenai and Na’vi costumes. i took a makeup sponge and blotted over the hose and made scales. yay!
 the major limitations we ran into were
1) square frame is not so great on curves. like the collarbones. need a bendable frame or a lot of repositioning so its a bit tough in those areas
2) when covering larger areas, the small frame i made was a bother cuz its challenging to line it up just right and not ruin your pretty lines in the overlapping scales.
3) sponging on the paint required the pressure with the sponge and the amount of paint you loaded up to be just right. if there was too much pressure or too much paint the hose being fabric just let all the paint through and you got a big blob rather than neat lines separating your lovely scales. the quick rescue for that was to use a Qtip to clean up the lines, or being easy to wash off paint, wipe it off and try again. we did both many times. you can still see some blobs in the final makeup but i felt they should be somewhat irregular and what was left was not too bad.

 Once we were satisfied we coated it all with Ben Nye Final Seal which allowed me to ride an hour to the party with paint on my back and none of it rubbed off on the cloth seat or got smudged. it also didnt sweat off which was a significant thing in the hot club dancing the night away. yay!
Things i will want to try later would be airbrushing the paint rather than sponging, a larger and/or bendable frame, and different patterns of hose.
So that’s how i made a dragon/reptile girl.
Skyrim Khajiit – DragonCon 2012 wrapup & 2013 battleplan
sooo… my follow-through sucks. when it got down to the wire for last year’s Khajiit in Thalmor Robes i stopped taking pictures and posting and barely finished the cosplay with some so-so details. however the overall product was great! i handpainted the prosthetic with the PAX (pros aide + acrylic) in the hotel room the night before but the costume didn’t come alive until it was all on. oh but when it did! check it out.
here are the best quality pictures from the con.

here are some of my favorite highlights from the con with other Skyrim cosplayers in addition to a pic with Felicia Day! omgfangirl!


So for this year, I intend to correct a few of the details that were subpar compared to the rest of the costume, particularly the clasp details on the chest piece and the belt buckle. Also, my husband is joining me in cosplaying Skyrim this year as a Khajiit in Novice Robes of Destruction most likely. so i’ll try to take pics of the parts of the process i skipped the first time around as well as when i remake those fastenings out of something other than sculpy, most likely Wonderflex.
i’ll have to look through the last few posts to see what i left out and try to take some pictures of the details to show how i did it. also, im happy to answer any questions if there are any.
we are trying a different prosthetic than last year, with a larger muzzle and no brow piece making it a little more cat and less human on the lower half of the face. i’m going to try to make a better means of covering my real ears beyond just arranging my hair over them.
so there it is and here we go again. =)
Thalmor robes – Trim (part 1) & Khajiit ears – Piercings!
so there is a lot of trim in about 4 different patterns along the vertical edges of the robes. this trim does not exist on its own so its up to me to create it. the plan for this was to buy ribbon in different widths and piece it together with glue. the horizontal wavy patterns i intend to work out my sewing machine skills and just use thread. haven’t done this part yet.
lesson learned: get the right glue! i had these glues available to me at the beginning: Fabric Fusion, Ok to Wash It, and Jewel It. i started with the FF and then tried OTWI. i got pissed off and went to the store for a different glue before trying the JI. the issue i ran into was that neither FF or OTWI are very tacky there’s no initial stickiness to keep the tiny ribbon in place while it dries, which takes a few hours. i heard the FF is very long lasting but if nothing will stay in place long enough to fuse then it doesn’t matter much, does it? what i got on this angry trip was the very tacky/quick drying glue. my strategy became to use mostly the FF with the Very Tacky at the start and ends and every few inches to anchor it while drying. EUREKA! worked much better after that.

lesson learned 2: i also found it helped to iron the ribbon so i wasn’t fighting its desire to curl and twist.
when i initially started there was a long process of mapping out the pattern and measuring and doing math and such. absolutely necessary but tedious. i use mostly chalk as temporary marking on fabric FYI. that way i can wipe it off.
so heres what i got finished before i ran out of the 1/8″ ribbon.


it honestly reminds me of Professor Snape as it stands. i had to order more ribbon as i bought all there was. it was very annoying finding the exact one i needed too. darn you JoAnn.
so i did say i would have a pierced Khajiit so heres the rings i found and placed.


woohoo! now i need to get brave and actually cut the leather for my mantle and bracers. very scary!
